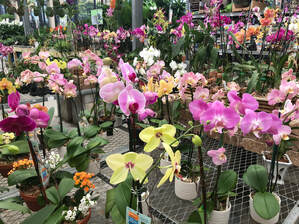
 As orchids have increased in popularity, so too has their availability at traditional nurseries, home improvement stores and grocery stores. So with more choices available, how do you know that you are selecting a healthy plant? Whether you are just looking for an arrangement that will last longer than traditional cut flowers, or you plan to nurture the plant for years of enjoyment, it’s important to take a few extra minutes to pick the right plant. 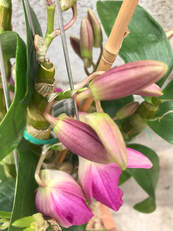 What to Look For When Selecting Your Orchid Buds and Flowers
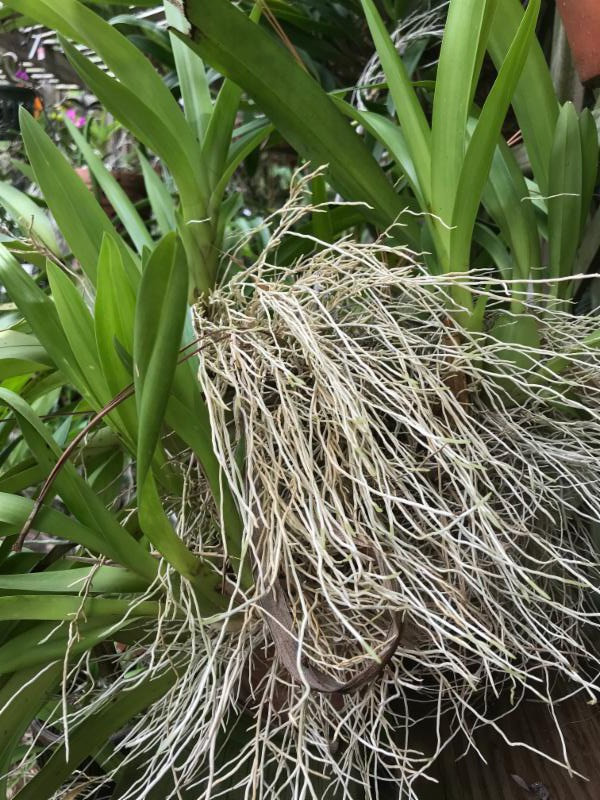
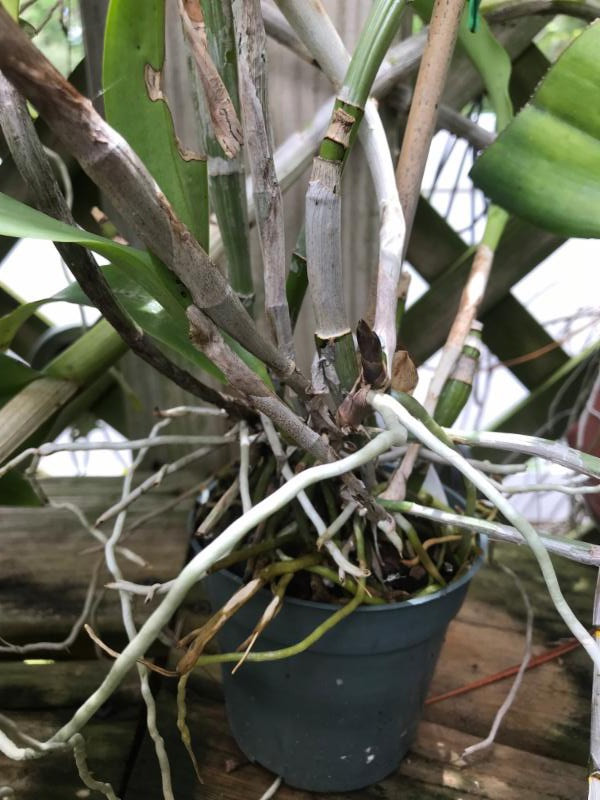
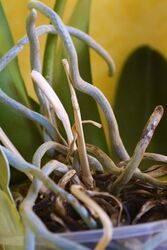 Roots
Foliage
Pots and Potting mix
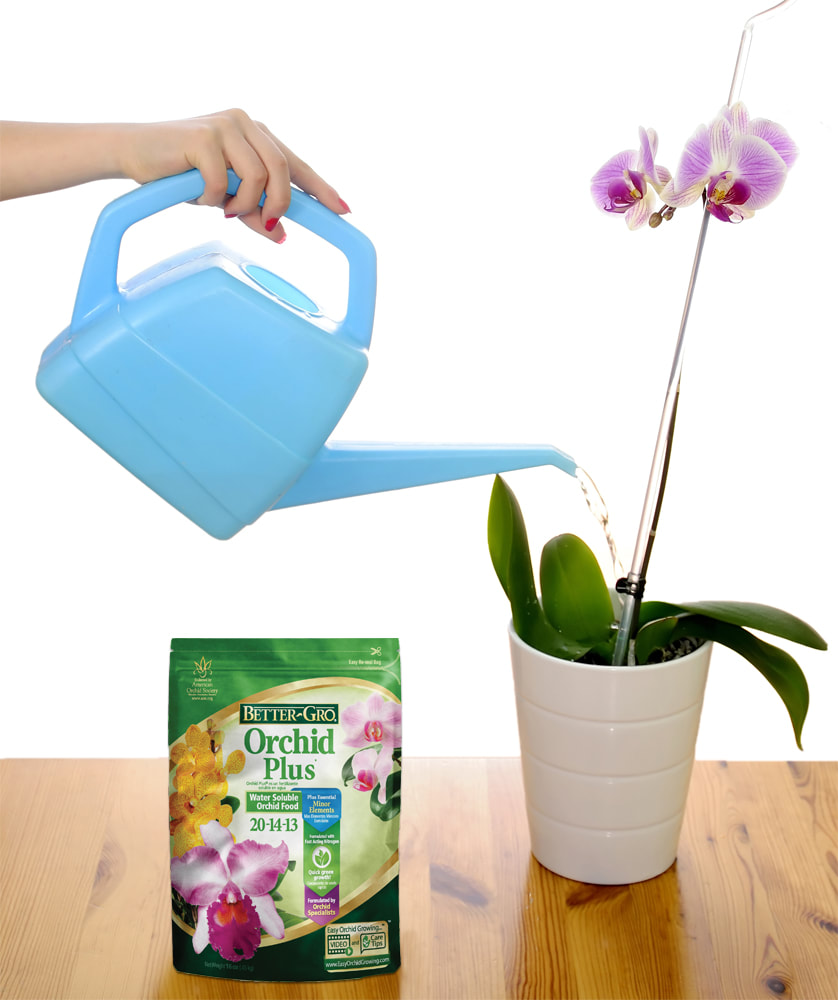
 Orchids Deserve Treats, Too Although the growing season is winding down as we head into fall, that doesn’t mean you should stop feeding your orchids. Routine, year-round feeding promotes healthy growth, bigger blooms and happier plants. So how should you “treat” your orchids? There are several ways to go about feeding your plants and selecting one method over another really depends on how much time you have to spend with your orchids.  Weakly Weekly The weakly, weekly method is probably the most common method for gardeners who have multiple plants and time to fertilize. This approach is typically performed with a water soluble or liquid plant food whereby you reduce the concentration of the fertilizer by diluting it with additional water. With our Better-Gro® Orchid Plus plant food, we recommend one teaspoon per gallon of water when feeding with the weakly, weekly method. First and Third Friday Feedings Other growers prefer the less time-consuming method for providing plant food by picking a particular day to fertilize. One way to remember this may be to always feed on the first and third Friday of the month. Place a reminder on your calendar and follow the manufacturer’s instructions for mixing your plant food. When usingBetter-Gro® Orchid Plus®, twice monthly, we recommend mixing a half of a tablespoon of plant food per gallon of water.  Continuous Release If you are always on the go and have limited time, don’t worry. You don’t have to deprive your plants. We suggest a continuous release formula like our Better-Gro® Houseplant, Bromeliad & Orchid Food because it that will feed your plants with one application for up to 12 months. Specially-formulated pellets release nutrients over time, so you don’t have to worry about over- or under-feeding your plants.  Extra Treat for You and Your Plants If you really want to treat your plants and treat yourself to bigger, better blooms, try including Better-Gro® Orchid Better-Bloom® into your feeding routine. This plant food formula includes a high content phosphorous that serves as a powerful blooming agent. Your plants will produce more blooms, deeper colors and larger blossoms. We recommend giving your plants Better-Bloom every fourth watering. 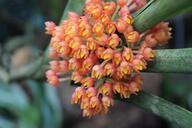 Don’t forget your orchids this Halloween. They like “treats” too! Boo-Yah!
Happy Blooming and Happy Halloween from Better-Gro! 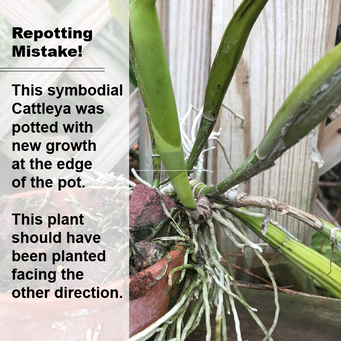 Tip #1 To Center or Not to Center? Knowing if your plant is monopodial or sympodial will help you determine where to place your plant in the new pot. Monopodials such as Phalaenopsis and Vandas grow upwards from the center of the plant whereas sympodial plants like Cattleyas, Oncidiums and Dendrobiums grow sideways. Plant your mono plants in the middle of your pot. For sympodials, determine the direction of your plant’s new growth and place the old growth at the back edge of your pot. This simple trick will prevent tipsy, one-sided plants and will allow your plant to grow bigger and fuller before you repot again. 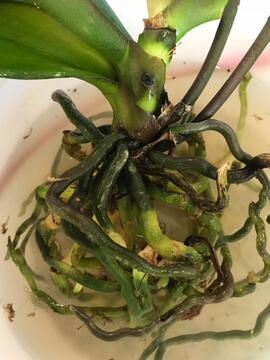 Tip #2 A Good Soaking Repotting can be stressful for your plants, so give them a boost with a good soak. If your plant is in healthy condition, mix a small amount of plant foodwith water according to the manufacturer’s instructions. Soak your bare-rooted orchid in this solution for approximately 15 minutes before you repot to help generate new root growth. If your orchid is sickly, you may want to try soaking your bare-rooted plant in a fungicide before repotting. This extra step will help give your sick plant a chance at survival. If you are repotting multiple plants, use fresh soaking baths between plants to avoid possible cross-contamination.
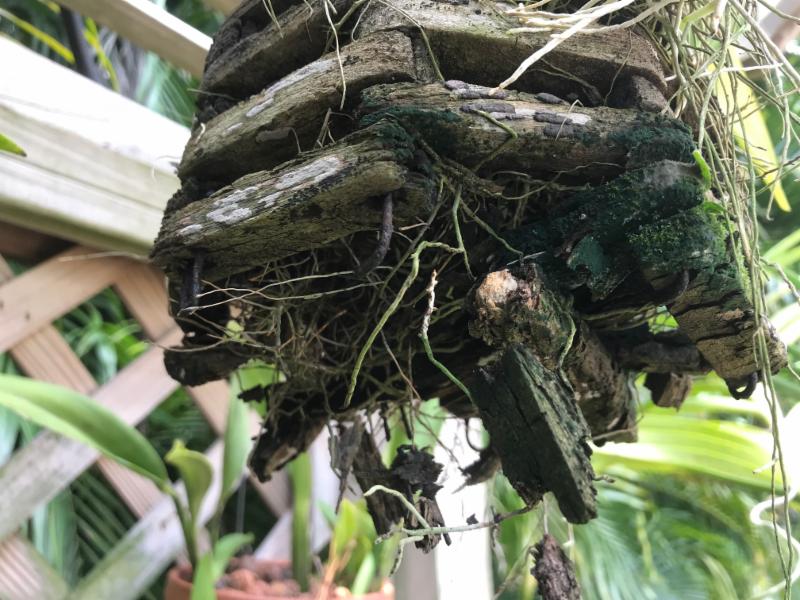
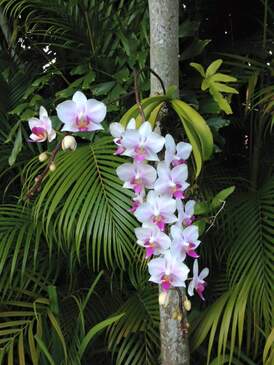 Bring some color, interest and unique accents to your yard by mounting orchids to trees near your entryway, by the pool or where you spend your time outdoors. Orchids are epiphytes and grow naturally in the wild in tree canopies. They derive their moisture and nutrients directly from the air and from surrounding debris. In most cases, host trees are not harmed by orchids which makes tree mounting a great option for your yard. Mounted orchids grow best in temperate zones and the tropics. Be sure to check the temperature tolerance of your specific orchid before relocating it to an outdoor location. Virtually every type of orchid including Vandas, Phalenopsis, Oncidiums, Dendrobiums and Cattleyas will perform well when mounted to a tree.
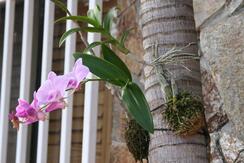 Orchids can be attached to trees using a variety of different methods.
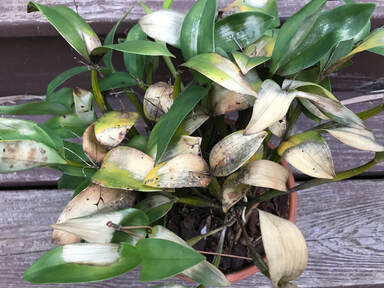
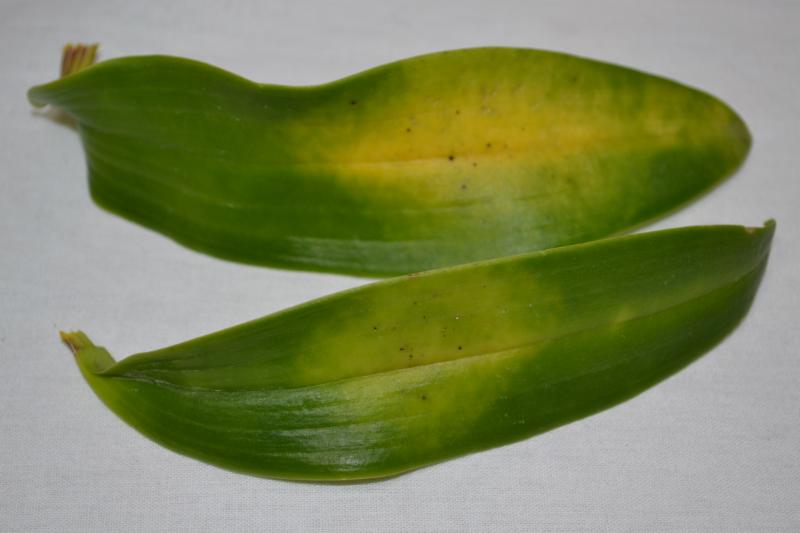
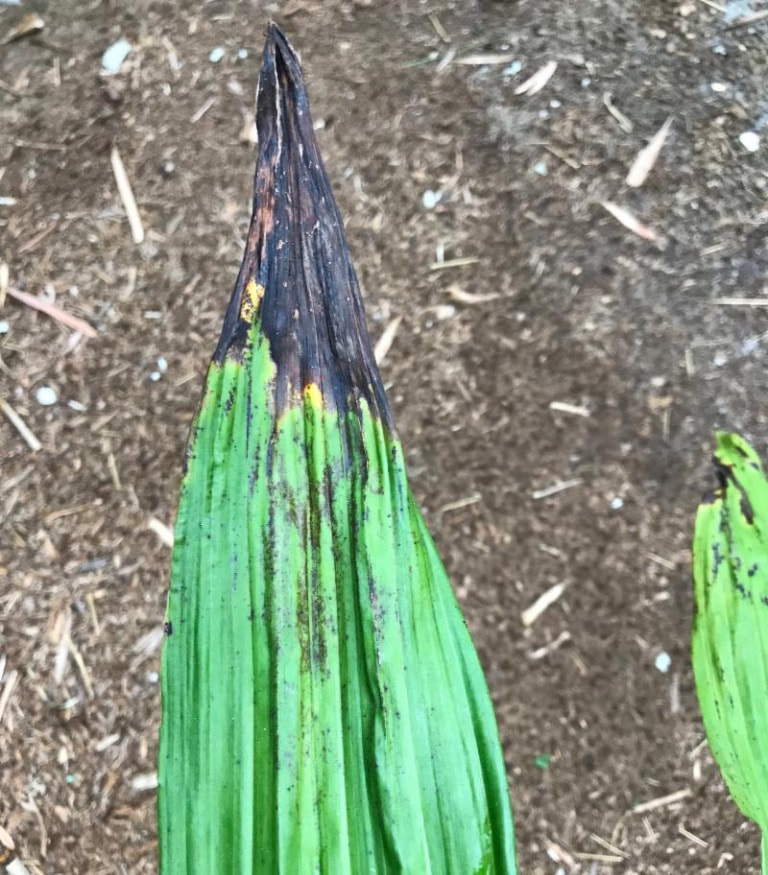
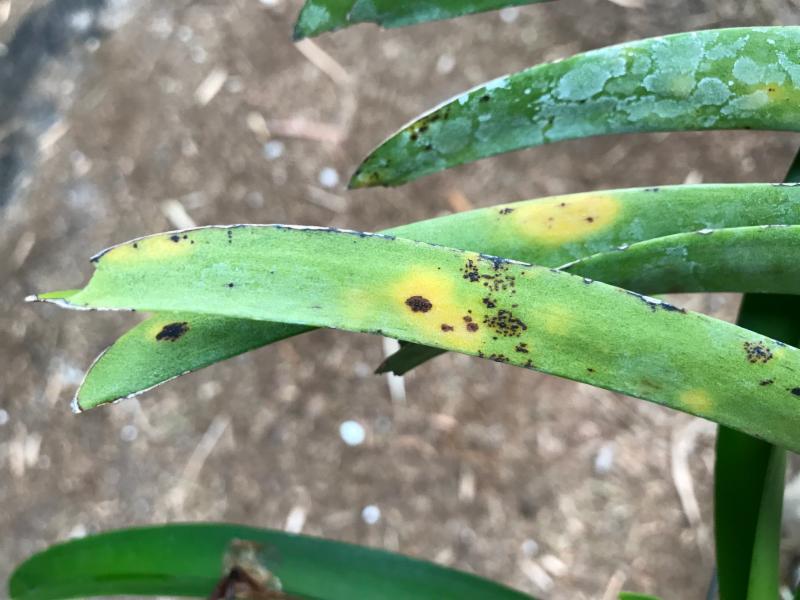
Option 1: Simply attach the orchid to a tree limb and secure with biodegradable twine. You may want to wrap the root ball in sphagnum moss to initially keep the roots from drying out. Option 2: Create a burlap pocket filled with your orchid plant and Better-Gro® potting mix. Attach the pocket to the tree with twine. Over time, the twine and burlap will degrade, however, your orchid will have grown roots into and around the tree bark. Orchids attach best to trees with textured bark rather than smooth surfaces like certain palm species. The best time of year to mount orchids to trees is (1) when your orchid is heading into the growing season (2) during the wet time of year, typically the summer. With minimal effort, expense and care, your orchids will quickly adapt to their new surroundings. You will be rewarded with fresh blooms and a new look in your yard. 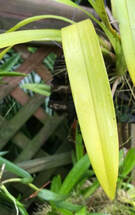 A few months back, we talked about orchid leaves turning purple which can commonly occur during the winter. Now that we are in the final weeks of summer with plenty of heat still lingering, let’s talk about yellow leaves. There are a number of reasons why orchid leaves turn yellow, some of which should cause concern while others are just part of your plant’s natural life cycle. Repotting Stress If you have recently repotted an otherwise healthy plant, yellowing leaves may be a sign of stress. It is completely natural for a repotted orchid to shed leaves. The first stage of this shedding process will be the yellowing of select leaves. There is nothing to worry about if the rest of the plant looks strong. 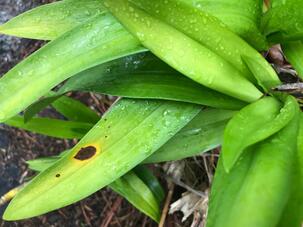 Too Much Sun If you grow your orchid outside, summer is the time when you need to take extra care to ensure that your plants aren’t getting burned. If the pseudobulbs and roots of your plant look healthy, but the you notice yellowing leaves, it’s likely that your orchids are simply getting too much sun. “Sunburn” will start on the highest point of the leaf. Leaves will turn from a nice healthy looking green to a lime-ish green then to yellow. If nothing is done to protect your plant, you will eventually find unsightly, round, papery spots that will permanently scar your plant. 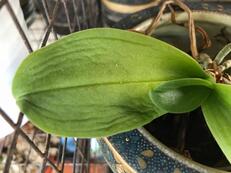 Too Little Water or Too Much Water If your leaves are beginning to turn yellow and are also floppy, wrinkled and/or leathery it is likely that your plant needs more water. Water your plant thoroughly and allow the water to completely drain. On the flipside, overwatering can cause your plant to yellow. If your leaves look droopy, sickly and even slimy, you may be watering too much. Overwatering can kill a plant literally from the roots up. The roots of an overwatered plant will turn black and begin to rot before your leaves alert you that there is a problem. If you think you have overwatered your orchid, place your plant in a well ventilated location to allow more air flow to stave off bacterial or fungal infections. Wait until the potting media has dried out, then begin watering your plant again with less frequency than before. Natural Life Cycle If the lowest leaves of your otherwise healthy looking Phalaenopsis plant begin to yellow, don’t worry and do nothing. Your orchid is just going through a normal growth cycle to shed older leaves. We recommend that you avoid the temptation to cut the yellow leaf. Doing so could introduce fungus through the open cut wound. Your plant will seal the cut area if you allow the leaf to naturally die and fall off. 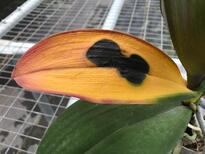 Bacteria, Fungus and Viruses Yellow leaves can often be a sign of a bacterial, fungal or viral infection. Check the underside of your leaves as well as your roots for signs of infection and treat with a Bactercide, Fungicide, or Virucide. Use as directed by the manufacturer. The key to happy, healthy orchids is to listen to your plants. We hope next time you spot a yellow leaf, you will have a better idea of what your orchid is trying to tell you.
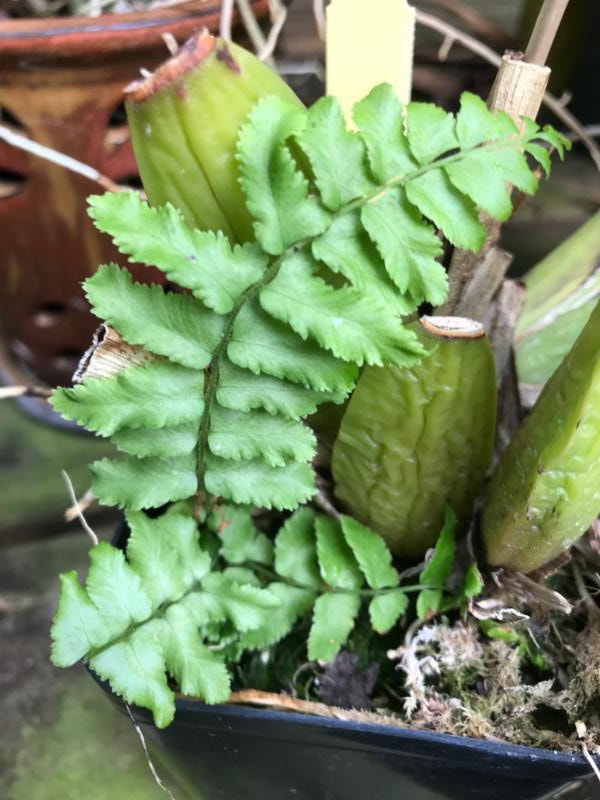
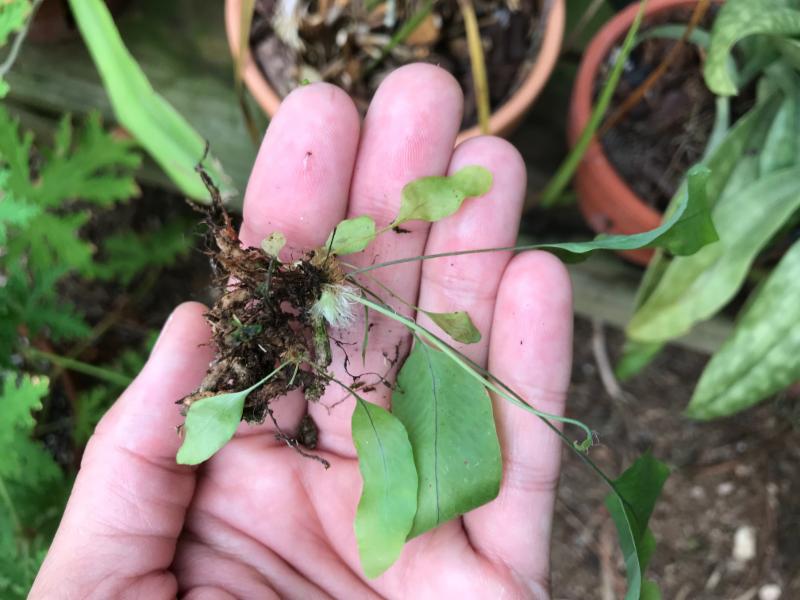
Happy Blooming from Better-Gro! 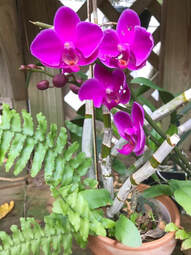 We love ferns but don't let them get mixed up with your orchids. Ferns are orchid foes not friends! This may sound counterintuitive in that ferns and orchids are both epiphytes. So, by definition, they derive their nutrition from air, rain and their surroundings. Neither harm their host plant, but when grown side-by-side, ferns and orchids can act like young siblings fighting for attention. If you want your orchids to thrive, it’s best to remove the foe before it can do any damage.
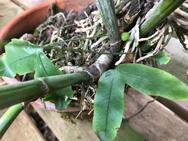 These simple steps will help ensure that your collection remains an orchid collection rather than a fern collection.
Happy Blooming from Better-Gro! We’re often asked: (1) How do I know when to repot my orchid and (2) What is the best time to repot my orchid. Whether you are a first-time orchid owner or a long-time collector, follow these simple suggestions for repotting success.
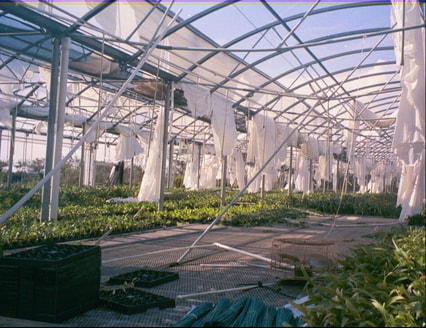 Damage to a Better-Gro greenhouse from Hurricane Charley Damage to a Better-Gro greenhouse from Hurricane Charley After you've stocked up on hurricane supplies and prepped your home in advance of a storm, you will likely want to turn your attention to your orchids and other plants if there is time. After all, some collectors have invested a significant amount of time and money into their orchid collections.
Pre-Hurricane Preparation Tips for Your Orchids Relocate and Secure Your Pots
In addition to structural damage, hurricanes can do a doozy on your landscape --- especially your orchids. We’ve assembled a few quick tips to help avoid further damage after a hurricane.  Too Much / Too Little Sunlight If a storm causes you to lose trees and branches that previously provided filtered light for your orchids, be sure to relocate your orchids to a shadier spot as soon as possible to avoid orchid sunburn. If you took your orchids indoors before the storm, make sure they are still receiving plenty of filtered sunlight. Often times, growers will move their orchids into a garage or bathroom to keep them protected but end up leaving them "in the dark" for too long while tending to other post-storm tasks. Saltwater Exposure If your orchids were exposed to saltwater associated with storm surge, it’s really important to flush your pots with fresh water. Saltwater can be very damaging to orchids. Salt, in a concentrated form, is a type of herbicide. The sooner you can clear the saltwater from your plants, the better your chances of saving them. Too Much / Too Little Water If your area received a lot of rain, check your outdoor pots to look to see if they are draining properly to avoid root rot. Drain holes may be clogged with debris and plant saucers may need to be drained. These efforts will also help to reduce breeding grounds for mosquitoes. If you relocated your orchids indoors before the storm, don't forget to keep them hydrated. The air in your home is less humid than outdoors. Try misting them often until you can move your plants outdoors again. 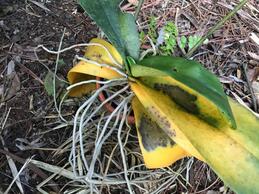 Stress
Hurricane stress isn’t just for humans, orchids can experience it, too. Watch for signs of fungus and bacteria. When a plant is weakened from changes in the environment, they are more susceptible. Treat at the first sign of fungus or bacteria and keep your sick orchids isolated from your healthy ones. Understanding the natural growing habitats of orchids helps us to understand where they should be happiest in our home. In nature, most orchids grow in tropical climates with lots of humidity, ventilation, and filtered light. Here are a few tips for growing orchids indoors and outdoors.  Finding the Perfect Indoor Spot Find a window that provides good filtered light throughout the entire day. In nature, most orchids grow in trees or within the landscape under trees and get filtered light from daylight until dark. Make sure the light your orchid receives is filtered with a sheer or screen. Don’t place a plant in a window with direct light as glass can actually intensify the light and cause burn. Orchids do well in bathrooms as they provide plenty of humidity. However, not all bathrooms have a window which is needed to ensure proper lighting. If you don't have a sunny window, grow lights are an alternative option. Also remember that humidity levels are important when growing indoors. Your air conditioner and heater are designed to remove humidity from the air. So you will need to provide additional humidity by misting your plants daily. Another alternative is to create a water reservoir with pebbles and a shallow dish filled with water to the top of the pebbles. By setting your orchids on top of the pebbles, your plants won't sit directly in the water - but humid air will rise around the plant to provide the humidity your plants need. 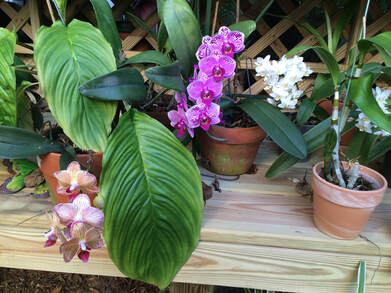 Outdoors with a view
Back porches, lanais or pool areas provide a great growing environment for your orchids. Just remember to place your orchid where it won’t receive direct sunlight. Be sure to check the light levels throughout the day as shadows and light patterns may change from the morning to the afternoon. Typically, an outdoor environment provides natural humidity, but it’s still a good idea to keep an eye on the weather. During certain times of the year, the humidity can be very low and you may need to mist your plants. Also pay close attention to the type of orchids that you are growing. For example, vandas often require daily waterings. Another benefit to outdoor growing is natural ventilation. However, during certain times of the year, the wind may be stagnant. Most plant diseases and insects thrive in hot, stagnant areas. A simple box fan can provide the circulation needed to keep diseases and insects at bay. While the information above offers good rules of thumb (a green thumb!), keep in mind that different types of orchids have different requirements. To learn how to care for specific orchid varieties, visit our common orchid varieties page for more details. Happy Blooming! 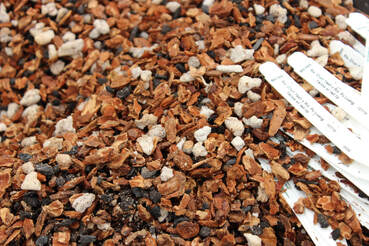 What potting mix is best for growing orchids? Bark, moss, lava rock? Well, the answer depends on the type of orchids you are growing, the location of your orchids, and how you care for them. For example, if you're in an area with a very dry climate, you should select a mix that retains moisture. If you grow your orchids indoors and tend to over water your plants, you will want potting mix that drains well. So how do you know which mix retains moisture and which ones do not? First, let’s look at the ingredients found in orchid potting mixes and their specific traits:
Of course, we don't expect you to find these individual ingredients and make your own orchid mix. Thankfully, our head grower applied his many years of research and experience to develop our line of Better-Gro Orchid Potting Mixes. The following products are the exact same mixes that we use in our greenhouses to grow thousands of plants each year.
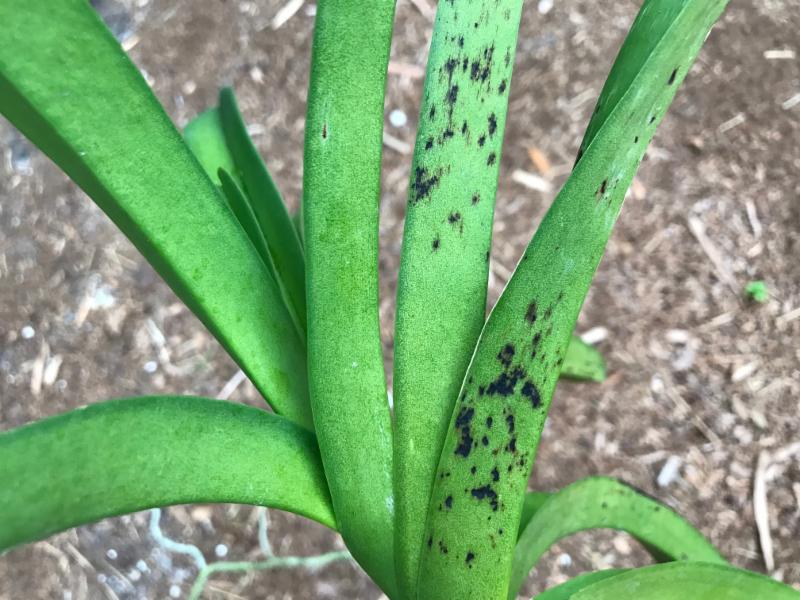
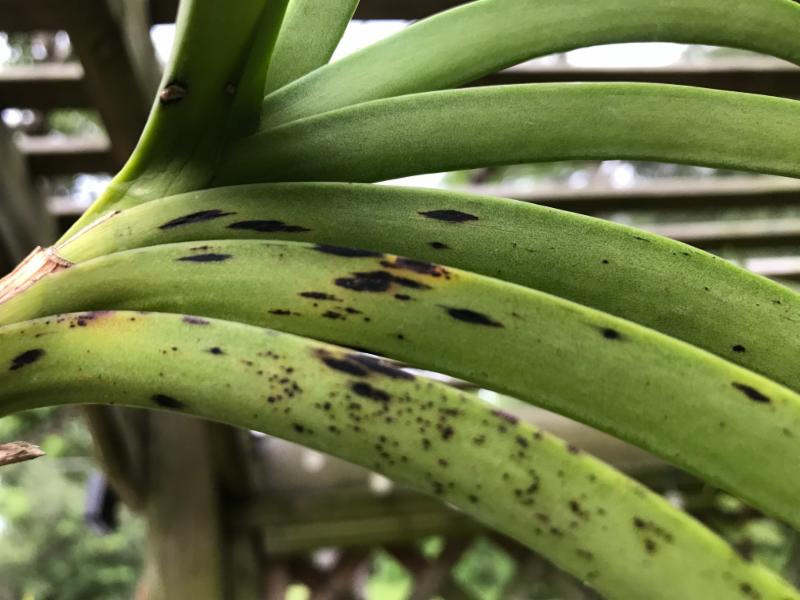
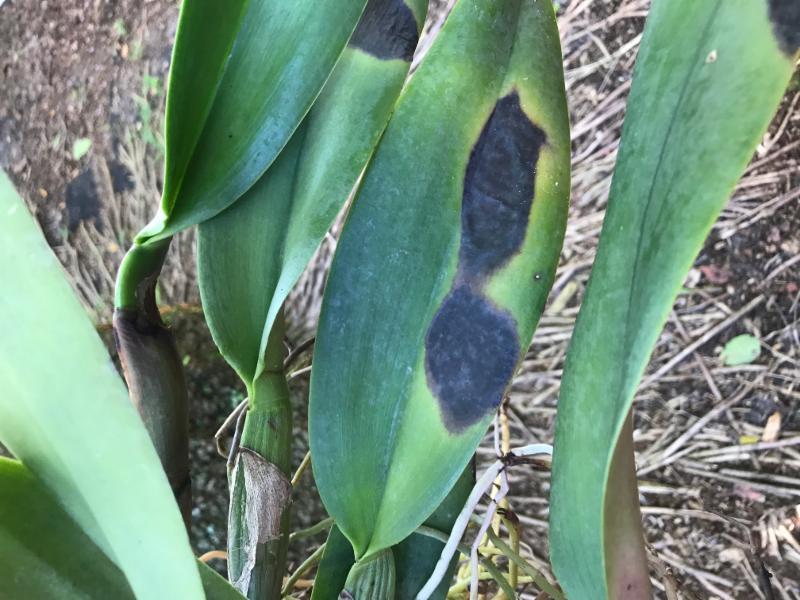
Summer is a time when fungal infections can quickly spread through your orchids. Fungi thrive in warm, humid conditions which coincidentally are the same conditions that most orchids need to survive. So, whether you are a greenhouse grower or your orchids are grown outside, you need to be vigilant about watching for the first signs of an infection. If left untreated, a fungus can kill your plants. But don’t worry, follow these instructions below to help detect, treat and prevent to bring your plants back to good health. Let’s talk about the most common types of fungi that may impact your orchids:
 Botrytis Signs Botrytis causes small brown spots on your flowers, ruining an otherwise beautiful flower. As the fungus spreads, you will notice more spots that are larger in size. Treatment Use a fungicide such as Physan 20, Daconil, Thiphanate Methyl according to the product directions. For a less toxic option, you may also use Hydrogen Peroxide in a spray bottle. You should know that spraying a fungicide will help control the fungal problem, but may also spot a flower or brown the edges. Prevention Improve the air circulation around your plants and remove dead plant materials (expired blooms, old pseudobulbs and dead leaves). Avoid watering flowers, and water early in the morning to allow plenty of time for excess water to be absorbed or evaporated. Also, monitor night temperatures and avoid dips below 60 degrees when possible.
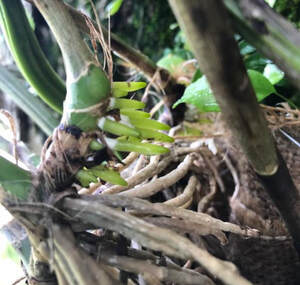
We hope you never find evidence of these fungal infections among your orchids. However, know that if you do catch it early, you can save your plant before it is too late. Remember to keep a clean growing environment, remove dead plant debris, allow for proper air circulation and water plants early in the morning. These simple suggestions will help keep the fungi away. Happy Blooming from Better-Gro! 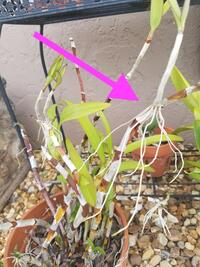 No, we aren’t keiki-ing or kidding! Nature really can provide two for the price of one. A keiki is an offshoot that forms on a mother plant. The word keiki is derived from the Hawaiian word for baby. So if you are lucky, from time to time, your orchid plants may produce a baby that can grow into a full-sized, flowering orchid. A keiki is just one way that orchids propagate and most commonly occur with dendrobiums, phalaenopsis and epidendrums. This particular type of propagation produces a new plant that will have the same characteristics as the parent plant. So flower color, size and fragrance will be identical. Where Do Keikis Grow? Dendrobium and epidendrum keikis typically develop along the cane. You will notice roots sprouting from the side or tip of the cane, and a new independent cane will form from these roots. On a phalaenopsis, keikis sprout from nodes along a healthy, green flower spike. 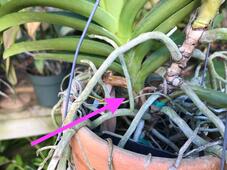 What Do You Do with Keikis? If you want to replicate the mother plant, allow the keiki to grow until the new plant develops a healthy root system and produces a new cane or multiple leaves. Be patient though, this growth process will take between six months to a year. If you prematurely remove the keiki, it will die. 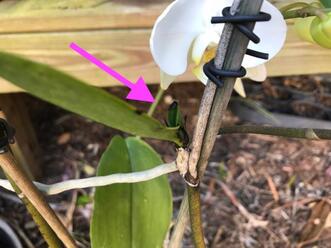 Removing a Keiki Simply use a sterilized cutting tool to remove the keiki taking care not to damage the new roots or the mother plant. Spray or swab the cut location with fungicide to protect the keiki and the mother plant from developing a fungus. If you don’t have fungicide readily available, sprinkle cinnamon from your spice cabinet on the wound. Cinnamon is a natural fungicide. For step-by-step instructions, refer to this American Orchid Society: Removing a Keiki Video. 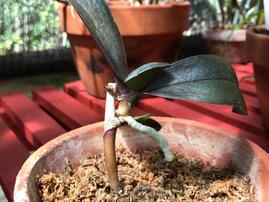 Caring for Your Keiki
Plant the baby orchid in fresh potting medium. Stabilize the young plant with a stake and clip. Mist as needed and over time, your plant will grow into an adult-sized orchid. For tips on potting your baby orchid, view this American Orchid Society: Potting a Keiki Video. Happy Blooming with Better-Gro! So you’ve had good luck with Moth Orchids (Phalaenopsis), and you’ve added color to your collection with a few showy Cattleyas. Now you may be looking to expand your collection but are worried that other varieties may be too difficult to grow. After all, most stores primarily sell Dendrobiums, Phalaenopsis and Cattleyas, so they must be the only easy orchids to grow, right? Wrong. The orchid family includes nearly 900 genera, and among those hundreds, there are lots of plants that are quite simple to grow under the same conditions as the most commonly available orchids. Let’s take a look at some additional varieties to add to your collection.  Brassavola Nodosa Commonly Known as "Lady of the Night" Not only is the white flower on this orchid quite unique, this hardy plant features a distinctive gardenia-like fragrance that peaks at night fall. Another reason we like this orchid is that when grown under the right conditions, Brassavola nodosa will bloom multiple times throughout the year. Temperature: Grows best in warmer temperatures ranging from 70º to 85º F and likes a slight drop in evening temps. Light: Prefers medium to high filtered light, similar to a Cattleya. Watering: Likes a well-drained potting media, such as Better-Gro ® Special Orchid Mix, or even a cork/driftwood mount so that the roots can air out between waterings. The Brassavola prefers a humid environment, so if you happen to live in a temperate zone, this plant will thrive outdoors. Feeding: Because this orchid will bloom throughout the year, it is recommended that you feed by alternating between our Better-Gro ® Orchid Plus ® and Better-Gro ® Better-Bloom ® plant foods using the recommendations on the label. 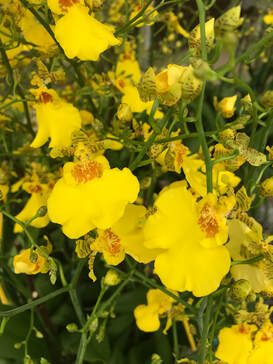 Oncidium 'Sweet Sugar' This orchid has been nicknamed the "Dancing Lady" due to its striking resemblance to a full-skirted silhouette that closely mimics a dancing lady when the flowers flutter in a gentle breeze. Some even say the flowers look like angels. Although the blossoms are typically just 1" or less in size, don’t be fooled by the tiny size of this plant’s flora. The sprays on this plant easily rival other larger-sized orchid blooms. Temperature: Thrives in day time temperatures ranging from 70º to 85º F. Light: Grows best with bright filtered light. Watering: Oncidiums are equipped to store water in their pseudobulbs which makes them more draught tolerant. Be sure to use a well-drained potting media, such as Better-Gro ® Special Orchid Mix, to allow the plant to dry between waterings and watch for the tell-tale sign that your orchid needs water when you see the pseudobulb start to shrivel. Feeding: We recommend the same plant food routine as listed above for both Oncidiums and Brassavola. Alternate between our Better-Gro ® Orchid Plus ®and Better-Gro ® Better-Bloom ® plant foods using the amounts shown on the label. In addition to this bright yellow color, Oncidiums are available in a variety of colors including red, pink, green, white and brown. Some varieties even have a scent including the 'Sharry Baby' variety that smells like chocolate. 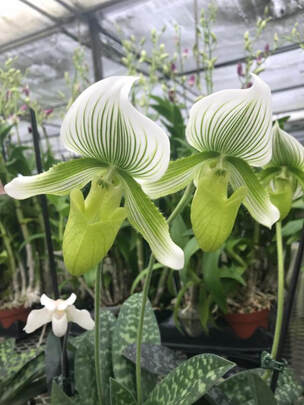 Paphiopedilum Maudiae Makuli-Curtisii-Maudiae x Paph. Maudiae 'Napa Valley' HCC/AOS x Sib Don’t be fooled by this exotic looking orchid. Paphiopedilum maudiaes are one of the easiest orchid varieties to grow. Commonly referred to as the "Lady Slipper Orchid" because of the pouch-like lip that resembles the toe of a slipper, flowers on this plant will last up to two months and often bloom one to two times a year. The mottled foliage of the Paphiopedilum maudiae is prettier than most orchid varieties and rivals many indoor houseplants. Temperature: This orchid prefers cooler temperatures than the orchids listed above. The Paphiopedilum maudiae grows best between 65º to 85º F and needs cooler night temperatures to form buds. Light: In a natural setting, this orchid grows on the forest floor. In a greenhouse or outdoor environment, provide filtered light and avoid direct sunlight. Watering: Although the lip of this orchid looks like the ideal vessel to hold water, you should avoid getting water in the pouch as this will cause the flower to rot. Paphiopedilums don't have pseudobulbs like other orchid varieties, so it is important to water regularly. Potting media should remain cool to the touch, but water should flow completely through the pot to avoid root rot. Feeding: Paphiopedilums do not need as much plant food as other orchid varieties. We recommend cutting the strength of your plant food to a quarter or half strength of what is shown on the label. In addition to the white and light green flower shown above, the Paphiopedilum maudiae is also available in a deep eggplant purple. We hope you enjoy experimenting with these additional orchid varieties. They are sure to bring fresh blooms, interesting foliage and diversity to your collection.
Happy Blooming from Better-Gro!
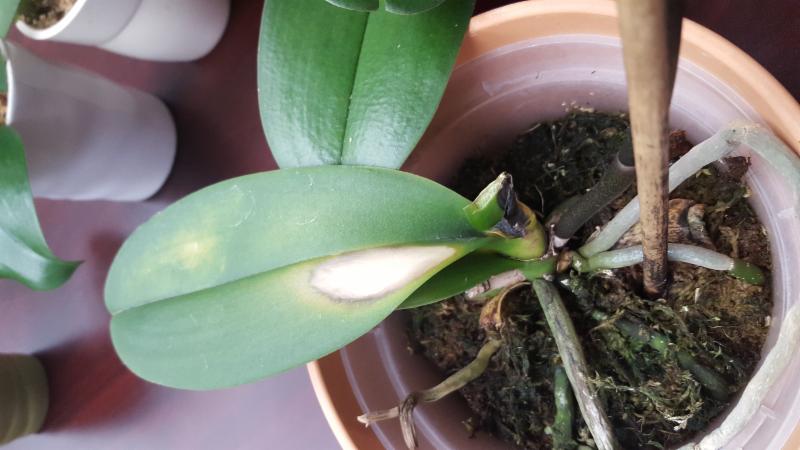
 An orchid severely damaged by too much sun An orchid severely damaged by too much sun Improper Light Levels The right amount of light is essential for maintaining plant growth and encouraging re-flowering of your orchid. High light levels lead to leaves that are yellowish in color and in some cases can cause scorching of the leaves. This scorching first appears as white patches on uppermost leaves, which eventually turn brown. Extreme cases of scorching can kill the plant! Yellowish leaves caused by high light levels are easily remedied by moving the plant to a slightly shadier spot. Low light levels typically won’t kill your plant, but it is the most common reason people fail to re-bloom their orchids. In this scenario, plant leaves are typically dark green and the plant fails to re-flower during its normal blooming season. The ideal leaf color should be an even, medium-green. Slowly increase the light level over a couple months by introducing the plant to slightly brighter conditions, until the desired leaf color is recognized. In Phalaenopsis, low light levels can also lead to soft, floppy elongated leaves. Most orchid problems are preventable.
There really is no magic to growing orchids successfully; just some preparation and care is all you need. For more information about proper air movement and light levels, watch our video below. Happy Blooming! There are several factors that lead to poor orchid growth. Correctly identifying the source of the problem is key to understanding how to treat it and avoid it in the future. In this post, we’ll discuss the most common issues that arise from improper watering and feeding levels. 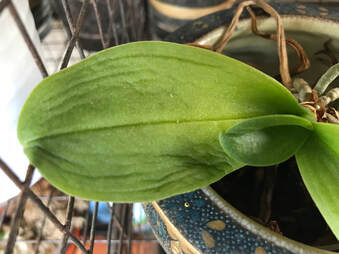 An under-watered Phalaenopsis An under-watered Phalaenopsis Overwatering and Underwatering Not too much and not too little - but just the right amount of water will make your orchids very happy. But how do you know how much is just right? Over-watering is the most common problem associated with poorly performing orchids. Symptoms can look very similar to those of under-watered plants because it often rots the roots and therefore prevents them from taking up adequate amounts of water. The first thing to do is to examine the roots of the plant. If the roots are rotted (soft, black and soggy) then chances are the plant is being over-watered. If the potting media is fresh and the pot size is not too large, then you will need to cut back on the frequency of your watering. Also, because the rot is often associated with a bacteria or fungus, you may need to drench the plant or pot with a good fungicide or bactericide. Under-watered plants often exhibit limp or withered leaves and withered stems or bulbs. This happens because the plant is not getting enough water to keep the leaves, bulbs, or stems turgid. If the pot is not too small for the plant and the roots are in good health (white and firm), then this is easily remedied by watering the plant more frequently. Remember that Cattleyas and Dendrobiums like to dry between waterings. Once the potting media dries out, you should water the orchid promptly. Do not let the orchid stay dry for a prolonged period. Also, realize that larger pots tend to stay wet longer than smaller pots. One trick to learn is to lift the pot up when it is ready to be watered and note the weight of the pot. Now, water your plant thoroughly and let it drain for 5 minutes, then lift the pot up and again note the weight. The difference in pot weight is noticeable and, over time, this can be a quick and easy way to tell when your plant requires watering.
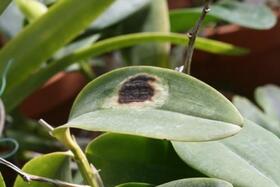 It’s hard to believe, but orchids can get sunburned just as easily as humans. Many of us take precautions such as sunscreen, hats and special clothing to avoid the sun’s harmful rays, but what can you to do prevent burns to your plants this summer when the sun’s rays are at their strongest? Orchids need sunlight to grow; however, many varieties prefer indirect sunlight. Whether you keep your orchids indoors or outside, you need to take precautions against sunburn. Indoors Sunlight can be amplified by the windows in your home. Some direct sunlight is okay but prolonged exposure can result in sunspots. Try a north or east facing window to avoid the strength of late afternoon exposure. Additionally, be sure that the leaves of your orchid plant are not directly touching your windows. Outdoors The pattern of the sun changes throughout the year, so areas that may be shaded in winter may be in full sun during the summer. Sun and shade also change seasonally due to fallen leaves or routine tree and shrub pruning.
Within the Orchidaceae family, there are flowers of all shapes, sizes, colors -- and fragrances. Many orchid species have strong scents, which range from putrid to pleasant. Here’s a look at why orchids have such an array of aromas, along with some species you might want to smell and others that are quite offensive. 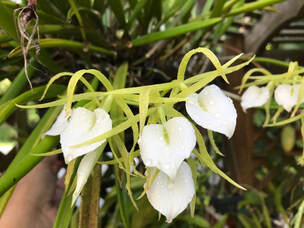 Brassavola nodosa Brassavola nodosa Fragrances Help to Attract Pollinators In the wild, orchids’ scents help the plants attract pollinators. Often an orchid’s scent is tailored for a specific pollinator:
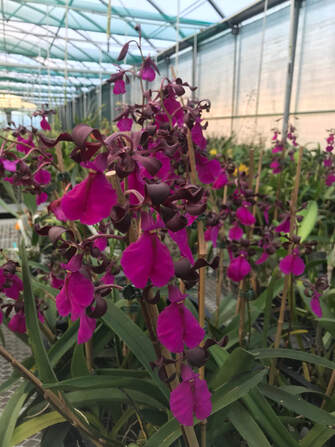 Encyclia cordigera rosea Encyclia cordigera rosea Sweet Smelling Orchids There are many sweet-smelling orchid species in a number of different genera. The following are just some of the delightfully fragrant orchids grown by Better-Gro:
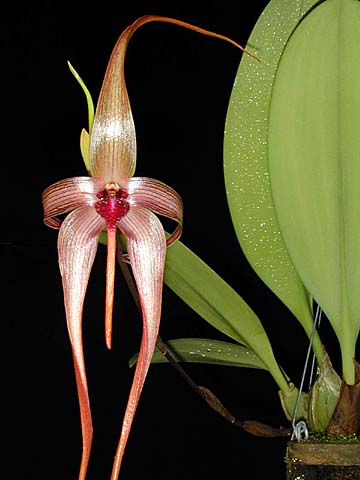 Bulbophyllum echinolabium Photo Credit: Orchidspecies.com Bulbophyllum echinolabium Photo Credit: Orchidspecies.com Foul-Smelling Orchids Smell Like Decaying Matter Although you’ll rarely hear them discussed and almost never find them in a mainstream nursery, there are a number of offensively smelling orchids. Some of the worst smelling orchids are in the Bulbophyllum genus:
As mentioned, these orchids aren’t trying to deter predators with their scents, although they may send you running away. They’re trying to attract insects that thrive on decaying matter. 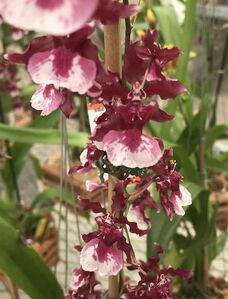 Oncidium Heaven Scent 'Sweet Baby' Oncidium Heaven Scent 'Sweet Baby' Orchids Smell Best in the Morning and Evening Most fragrant orchids smell strongest in the morning or evening, when the pollinators they’re trying to attract are most active. Many species give off their scents in the morning, but some, like Lady of the Night, try to attract nocturnal moths and other insects by saving their scents for the evening. Additionally, orchids will often smell stronger on warm, sunny days than cool, cloudy ones. The higher temperatures and sun heat up the plants’ oils, causing them to put off a stronger fragrance. Orchids are fascinating plants with diverse flowers. To learn more about different kinds of orchids and their blooms, as well as how to care for them, we invite to peruse our website. Happy Blooming from Better-Gro!
 Dtps. I-Hsin Song Dtps. I-Hsin Song Phalaenopsis orchids are beautiful and prolific. If left alone, each spike produces five to 10 blooms at a time, and each flower can last up to three months. With a little care, however, you can coax even more flowers out of a Phal. Here’s how you can enjoy almost never-ending blooms on a Phalaenopsis. Check Your Phalaenopsis After Blooming Before trying to entice a Phalaenopsis spike to produce more blooms, you need to check the plant and the spike’s health. First, only healthy, green spikes should be coaxed into flowering a second time. If there is any yellowing on the spike, it’s drying out and will eventually die. It should be cut back to the base, even if just the tip is yellowing, to let the plant focus on developing its root system and growing leaves. The orchid should flower the following season, within 12 months, and its flowers will likely be larger because the roots and leaves will be more developed. Second, only spikes that don’t have any more buds on them should be trimmed. Occasionally, a spike will cease growing and flower, only to grow again and produce more buds. If there are more buds on the tip of the spike, leave it alone until they finished flowering. 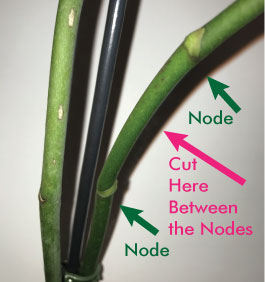 Cutting Back a Phalaenopsis Spike As long as a spike is healthy and has no more flowers, you can try to coax more flowers out of it by trimming it back. Instead of cutting it all the way back to the leaves, leave two nodes on the spike. Cut it about ½ inch above the second of the two nodes. (Nodes are the little bumps on the stem.) Most of the time, if the plant is healthy, and conditions are right, one of the two nodes will produce a side shoot. This side shoot will begin flowering within eight to 12 weeks. Although these flowers may not be quite as large as the initial group of blooms, they will still be beautiful and last for a long time. In some cases, the node will form a keiki, which is a little plant. Keikis must remain attached to the mother plant for two years, at which point they will begin to develop roots and can be planted on their own. During these two years, however, a keiki will send up spikes of its own, which will produce flowers. Timing Your Trimmings As long as a Phalaenopsis is healthy, you should be able to continue cutting its spike back to produce more side shoots and additional flowers. If a Phal has more than one spike, timing your trimmings can produce virtually never-ending blooms, because flowers can last for up to three months, and side shoots will produce blooms within two to three months. Keep in mind that when you keep flowering on the same spike, it will slow down the plant’s growth. It takes a lot of energy and nutrients for an orchid to grow a spike and flower. Just like people need a nap after exerting a lot of energy, your orchid will need a rest period after flowering to stay healthy. So, be sure to strike a balance between continual growth and rest periods.  Watering and Feeding Your Phalaenopsis
Between blooms, you should continue to water and feed your Phalaenopsis as normal. Its soil should be kept moist, although not soggy, and it should be fed twice a month with an orchid-specific fertilizer. If you’re trying to coax more blooms out of your Phal, alternating feedings between Orchid Plus® Plant Food and Orchid Better Bloom Plant Food will help maintain a healthy plant and produce beautiful blooms. Happy Blooming from Better-Gro! Delicious Scent & Taste: The Vanilla Orchid Widely used in sweets, perfumes, candles and more, did you know the vanilla bean originates from an orchid plant called the Vanilla planifolia? The Totonaco people of Mexico were the first known people to cultivate vanilla orchids to produce the sweet aromatic spice that is so commonly used today. 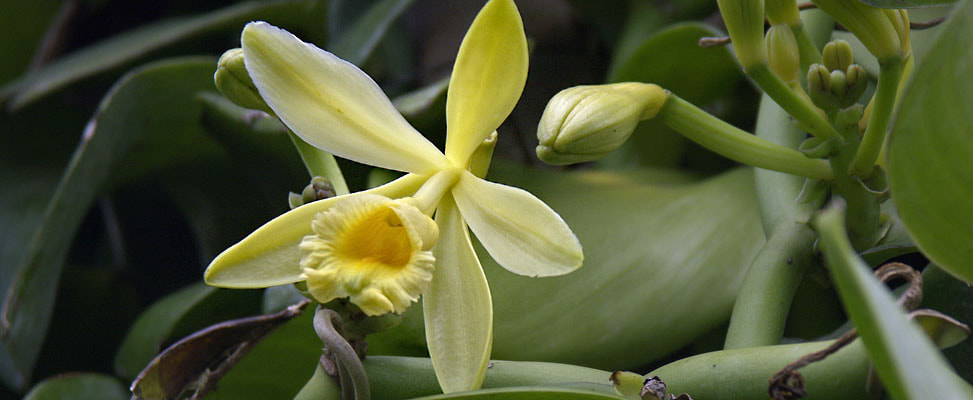 Photo Source: American Orchid Society 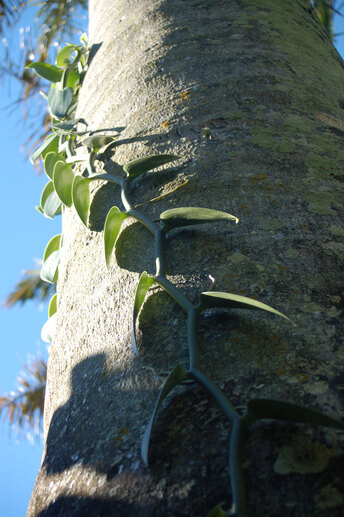 Photo Credit: Fairchild Tropical Botanic Garden Photo Credit: Fairchild Tropical Botanic Garden Cultivating Vanilla If you are looking to add this exotic orchid to your collection, know that it does take special care. In its natural habitat, Vanilla planifolia can grow over 100 feet long zig-zagging up tree trunks in a vine-like fashion with dark green alternating 3.5” sheath-shaped leaves. Clusters of aromatic cream-colored flowers will eventually form fleshy pods that can grow up to 10" in length. The vanilla orchid can be grown in a greenhouse under conditions similar to most other orchid varieties - tropical rain forest type conditions with filtered light, high humidity, and 60-70 degree temps at night and 80-95 degrees during the day. Pollination The vanilla flower blooms just one day, opening in the morning and closing late in the afternoon. Pollination through natural means is very difficult unless you live in Mexico where Melipona Bees are found. Otherwise, you will need to hand-pollinate your vanilla orchid to bear fruit. Flowers that go unpollinated simply shrivel and die. 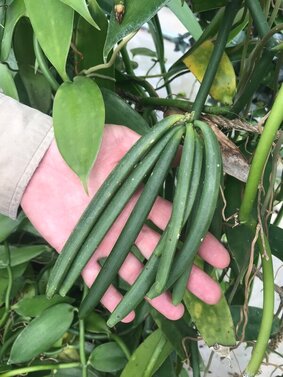 Photo Credit: Jimmy Turner / Twitter @TexaninOz Photo Credit: Jimmy Turner / Twitter @TexaninOz Worth the Wait A vanilla pod can take up to nine months to mature for harvesting. Wait until the bean has turned dark brown or black and is showing signs of splitting before you remove the pod from the plant. Removing the pod too early can result in a less flavorful bean. After the bean has been harvested, you will need to either sun dry the bean or place it in hot water for several minutes. In either case, the bean will need to dry in a ventilated location for 2-4 weeks after the sun drying or hot bath to produce similar results to commercially grown beans.  Easy to Make Vanilla Extract If you are lucky enough to harvest your own beans, you can make your own vanilla extract. Simply split the cured bean down the middle and place the entire bean into your favorite flavorless rum or vodka. Shake every few days. In approximately eight weeks, you will have your own vanilla extract. Wait even longer to allow the flavor to intensify. If you don’t have the patience to grow your own vanilla, try this trick with store-bought beans for a cost effective vanilla extract. Buying the Vanilla Orchid Most nurseries and garden stores do not sell vanilla orchids, however, there are growers online that offer these plants. Just be sure to purchase the flat leafed vanilla orchid as there are other orchids in the same family that do not produce the commonly desired vanilla bean. 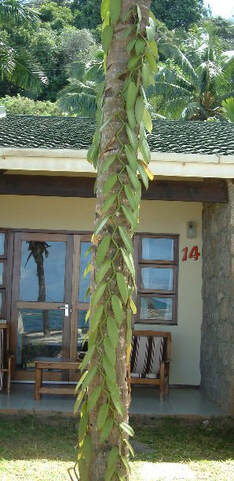 Ancient History
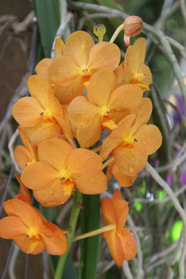
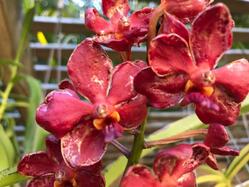
The Totonaco people discovered this delicacy deep in the tropical jungles. Myth has it that the blood of two lovers had fallen onto the floor of the forest and from that blood sprouted a vine with beautiful cream-colored flowers. The flowers gave way to this gift from the gods that filled the air with the scent of love and beauty. Some cultures believed the vanilla bean to have medicinal properties sure to treat headaches, indigestion and animal bites, while the Aztecs and Europeans believed the delicate spice to be an aphrodisiac. In modern times, Vanilla planifolia is not only a pretty orchid to enjoy but also a favorite flavor for many. Happy Blooming from Better-Gro! 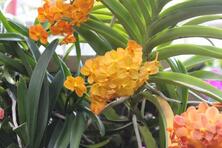 It's likely that you have stopped to admire a Vanda at your local garden center or even seen them growing in a greenhouse or your neighborhood. These eye-catching orchids certainly attract attention. Less common than Phalaenopsis and Cattleya orchids, Vandas require slightly different care than other orchid varieties, but they are well worth the effort! 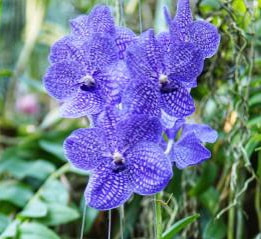 Blossoms Vandas are showy, long-lasting, frequent bloomers. They are very rewarding to grow and often times fragrant. Prized for their intense colors, they are commonly available in hot pink, orange, red and purple. The Vanda genus also includes a species with vibrant blue flowers called Vanda coerulea or the Blue Orchid (shown right). Unlike many other orchids that bloom just once a year, healthy Vandas can bloom throughout the year. 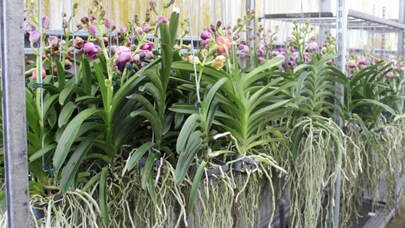 Leaves and Types Vandas are different from Cattleyas and Oncidiums in that they don’t have pseudobulbs. Water is retained in the plants' leaves which is why they need to be watered more frequently. Vandas come in three types and are easily distinguishable by looking at the plant's leaves.
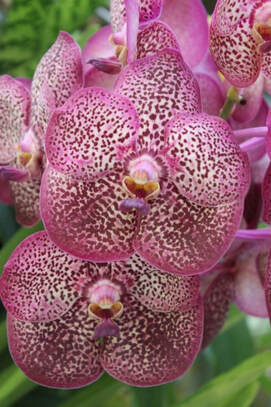 Vanda Origins Their natural habitat ranges from India and the Himalayas to China, the Philippines and New Guinea. A few species are found in the Western Pacific Islands and Queensland, Australia. Most species in the Vanda genus are epiphytes, meaning they grow on other plants without harming the host plant. By clinging to trees, Vandas have access to more sunlight versus growing on the forest floor, while still being shielded from direct sunlight by the tree canopy. In addition to growing in trees, some Vandas are lithophytic which means the grow on rocks, and some are terrestrial (grow on the ground).  Plant Size Vandas come in many sizes. Some are tiny and can fit in the palm of your hand whereas others can grow up to 6 feet tall. Individual flowers range in size from less than an inch to four inches. They grow in clusters with up to 15 flowers per stem. Vandas are easily recognizable from other orchids due to their long, rambling roots that enable the plant to cling to trees. Often times, you will find Vanda roots growing two to four feet below the plant. Vandas are unique in that they do not grow in traditional orchid plant media like fir bark and charcoal.  Caring for Vandas If you are interested in learning more about the ideal conditions for growing Vandas, please visit our Vanda Care Instructions on the Better-Gro website. There you will find recommendations for temperature, light, watering, feeding and humidity. We hope you will consider bringing home your own Vanda in the future. Please send us your photos on Facebook, Instagram and Twitter with the hashtag #BetterGroBlooms. Happy Blooming from Better-Gro!
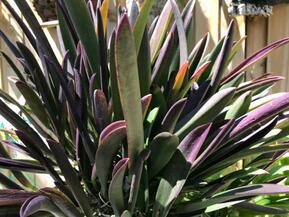 You’ve heard of the winter blues but what is making your orchids turn purple? “The purple coloration you see on the underside and sometimes topside of orchid leaves is a winter phenomenon,” says Robert Palmer, head grower at Better-Gro. “But don’t worry, this is completely natural. Many orchids that are grown outdoors either in pots or on trees go through this annual cycle.” Just as autumn leaves turn red, orange and purple in the fall, some orchids go through a similar change although they don’t shed their leaves. Purple leaves occur for several reasons. 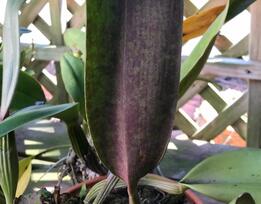 Winter Dormancy As you may remember from school, chlorophyll is what allows a plant to absorb light and produce energy. Purple leaves are a natural sign that your orchids have cut back on producing chlorophyll during a time of winter dormancy. Essentially, the orchid is saving energy for the spring time. In contrast, orchids that are dark green in winter are likely continuing to expend energy producing excess chlorophyll. What’s wrong with healthy dark green leaves? Nothing, however, it’s likely that your plant is focusing on its leaves rather than reserving energy to produce spring blossoms. 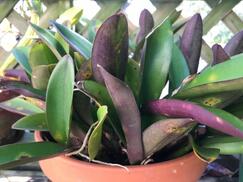 Excess Light Purple leaves can be an indication that your plant is receiving too much light. This light exposure is common with orchids grown outdoors due to reduced winter tree canopies. As long as your orchid is not getting burned, the excess light and purple leaves are not harmful. Cold Exposure Orchids that were exposed to winter cold spells will exhibit purple leaves if they are magnesium deficient. 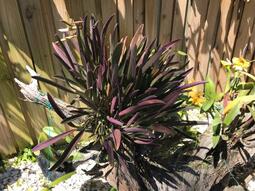 How Can You Reduce the Purple Coloration?
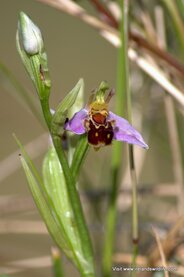
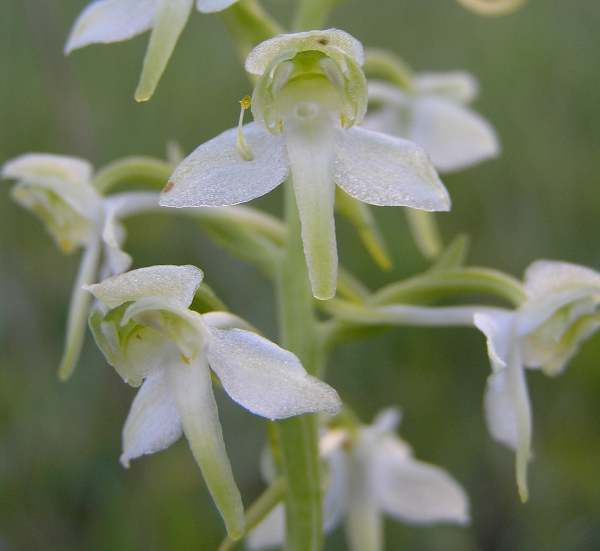
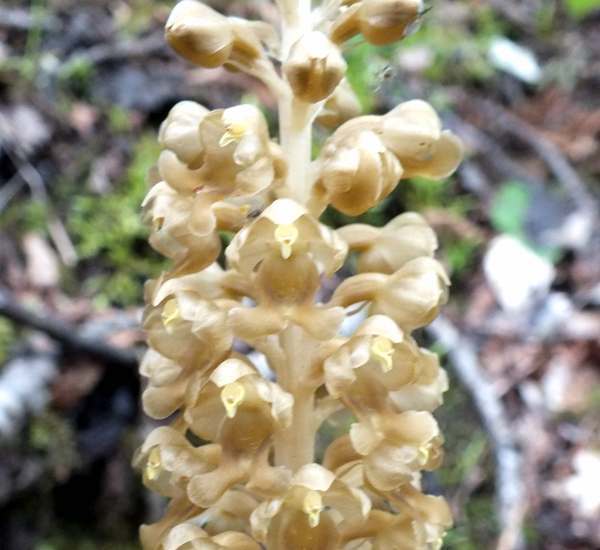
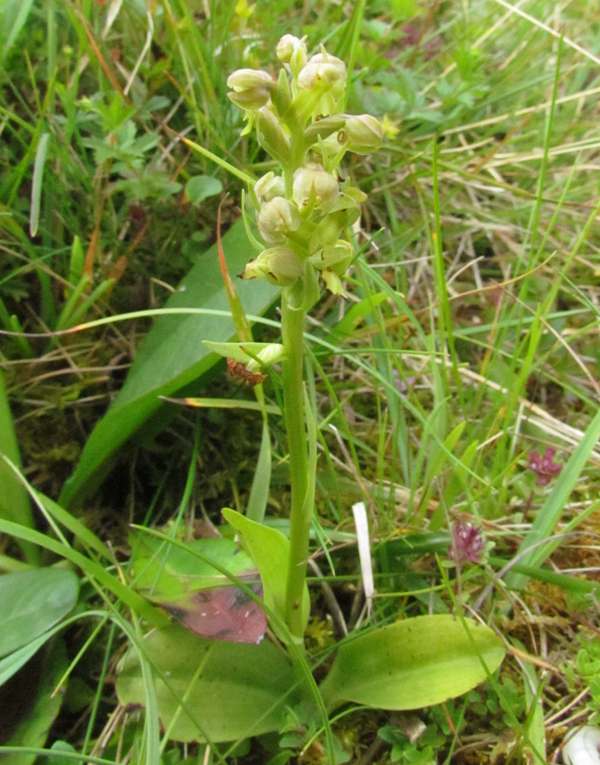
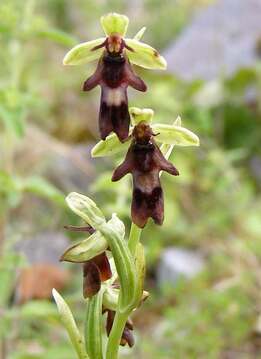
Although purple leaves are not harmful, you can give your orchids a leg up on spring and boost the flower-initiation process with Epsom salts. Simply mix 1 gallon of water with ½ to 1 Tablespoon of Epsom salts. Generously spray your plants once a month. This inexpensive treatment can be applied year-round and will help reduce purple leaves. Happy Blooming from Better-Gro! When you think of orchids, you typically think of tropical rain forests rather than the fields and mountains of Ireland. But , did you know Ireland is home to approximately 30 native species of orchids? In comparison to many epiphytic orchids that grow in the treetops, all of Ireland’s native orchids are terrestrial, growing in fields, bogs and limestone crevices. In honor of St. Patrick’s Day, we thought you might enjoy learning about some lesser-known orchids from the green island.
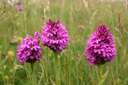
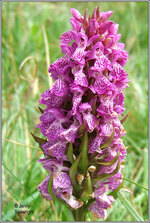 Western Marsh Orchid The Western Marsh Orchid (Dactylorhiza occidentalis), commonly found in the Burren region of Ireland, also grows in other European countries such as Switzerland and Germany. This gorgeous orchid boasts dark spotted leaves with dense flower spikes ranging in length from 1.5” to 6”. Seven to 40 red-purple and pinkish-purple blossoms cover each spike. The Western Marsh Orchid makes for quite the site along roadsides, grasslands and marshes.
May the luck of the Irish be with you and your orchids.
Happy Blooming with Better-Gro.
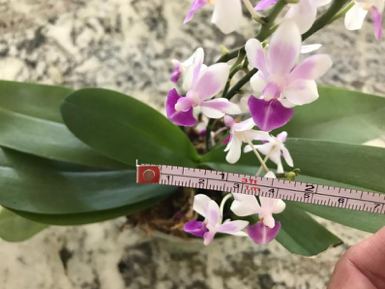 Mini Care These plants have the same needs as their larger counterparts: humidity, light, and warm temperatures. Water: Because of the smaller pot size, often times they will require less water than a traditional phal. We suggest that you water once weekly, making sure the pot drains entirely through the drainage holes. If you keep the plant indoors, you may need to lightly mist your mini to add humidity. Or, you can place the orchid pot in a container of water and pebbles making sure the pot is sitting on top of the rocks and not directly in the water. Temperature: Your orchid will enjoy the same temperatures that you do in your home. Keep your plant in a location that ranges between 65 and 80° F. Light: Place your mini in a bright location but avoid direct sunlight which may burn the leaves. Typically, southern or eastern facing windows are best. Plant Food: Use a water soluble, balanced plant food designed for orchids. Follow the care instructions on the label. Big Bonus Like their larger-sized cousins, mini phals will often bloom two to three times a year. We hope you enjoyed this mini tutorial. 😍 Happy Blooming from Better-Gro As you begin or continue your journey to learn more about orchids, we've pulled together a listing of basic terminology that you may encounter while researching these beautiful plants. We hope you find this list to be useful.
Aerial Roots: Roots that are above the soil’s surface – usually grown for plant support. Anther: The pollen producing part of a flower. Apical Meristem: Found at the tip of the shoot and the root of the orchid. By continually dividing its cells, it causes the plant to grow longer. Back Bulb: A pseudobulb of an orchid that remains on the plant after the terminal growth has been removed as a division. Baggy Baby: Also known as “blooming-sized orchid” or “packaged orchids” a Baggy Baby, grown and sold by Better-Gro, delivers the thrill of watching an exotic plant through all stages of its development. Bifoliate: A plant having two leaves on a pseudobulb. Column: The reproductive area of the orchid flower. Disease: Any deviation from the normal growth structure or quality of a plant that is a continuous condition producing visible symptoms, thus affecting the quality or value of the plant. Division: A form of plant propagation in which new plants are separated from the parent plant. Environment: The surroundings or conditions in which a plant lives or operates. Epiphyte: A plant that grows harmoniously upon another plant and derives its moisture and nutrients from the air, rain, and debris accumulating around it. Fertilizer: Also known as plant food. A natural or synthetic material which includes nitrogen, phosphorus, and potassium compounds that, when given to a plant, increases its capacity to support growth. Genus: A group of related plants consisting of two or more species possessing certain common characteristics distinct from any other group. Host: A plant that provides some or all the nutrients for a particular pest or fungus. Intermediate Orchid: A plant that falls in the middle on a growing range – meaning it is not a cool grower (grows in colder environments) or a warm grower (grows in warmer environments), but rather it can be grown in most growing environments. Keiki: Baby orchids that sprout from an orchid’s flower stems. Literally translated, “keiki” is Hawaiian for “the little one” -- and that’s just what keikis are. They’re little orchid plants. Leaf: The part of an orchid where its primary function is photosynthesis. Light: One of the key factors for growing a healthy plant. Plants use energy from light to convert carbon dioxide into food. Lip: The lower petal of an orchid used by flowers to provide a landing platform for its pollinators. Mericlone: An identical plant which was produced from tissue culture of the apical meristem. Orchidelirium: Having an obsession with orchids – inspiring scientists, collectors, and hobbyists alike. pH: A measure of the acidity in water. A measure of 6.5 pH is perfect for orchids. Pseudobulb: The storage organ found on sympodial orchids. Monopodial: Having one main stem which grows straight up. Pest: Any organism that can cause disease or injury to a plant. Rhyzome: An underground stem that connects two pseudobulbs. Sympodial: Having lateral continued growth (more than one stem) coming from a pseudobulb. Terrestrial: A plant that has roots that grow and receive nutrients from the soil. Virus: Microscopic pathogen which can be spread by insects or unsanitized equipment. For more information on orchid care, EasyOrchidGrowing.com Happy Blooming! |


Resources
|
Company |
|