|
Orchids, often associated with tropical climates and warm environments, may seem like delicate flowers that thrive in warmth. However, many orchid varieties actually benefit from exposure to brief periods of cold temperatures. In this blog, we'll explore the surprising advantages that chilly weather can offer to orchids, debunking the common misconception that they can only flourish in warmth. 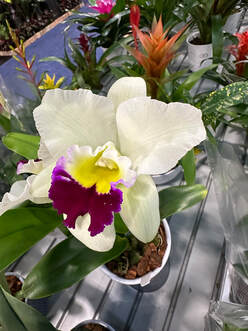 LC. Hsinying Catherine x Blc. Pratum Green '#73' LC. Hsinying Catherine x Blc. Pratum Green '#73'
 Rth. Linda Vee #21 Rth. Linda Vee #21 While orchids are often associated with warmth, it's essential to recognize the diverse range of species that can thrive in cooler conditions. Cold temperatures offer numerous benefits, from mimicking natural habitats to promoting dormancy and extending blooming periods. By embracing the chill, orchid enthusiasts can unlock the full potential of these exquisite flowers and cultivate healthier, more resilient plants.
If you are wondering how to get your orchid to rebloom, you are not alone. It's probably the question that we receive more often than any other orchid care question. The good news is, it's easy to get your orchid to rebloom if you follow these simple suggestions. 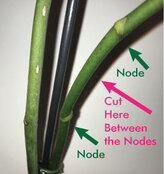 Cut Back or Remove the Old Flower Spike
Temperature Check
 Humidity
 Sunlight
 Feeding Your Orchid
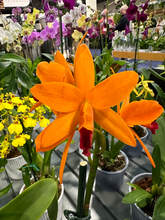
An orchid’s blooming cycle can vary widely based on light, temperature, feeding and time of year. Although most orchids bloom just once a year, there are plenty of orchid varieties that can bloom twice a year and sometimes year-round. If you are an impatient gardener seeking prolific bloomers, here are a few varieties that you may want to try.  Guaritonia 'Why Not' Guaritonia 'Why Not' Guaritonia 'Why Not' This orchid boasts dark red blossoms with a bright yellow center. Flowers are approximately 1.5” across and bloom in clusters with anywhere between three to 12 flowers per cluster. A mature plant will bloom several times a year with it’s primary blooming cycle in the spring. They prefer warm temperatures, high moisture, well-drained potting media, bright light (but not direct light) and regular feeding. They do well in pots, baskets or attached to wood. 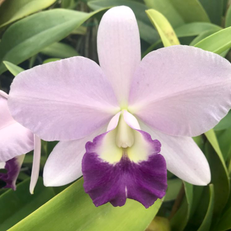 Cattlianthe 'Busy Bev' Cattlianthe 'Busy Bev' Cattlianthe 'Busy Bev' This regal looking hybrid boasts large flowers that are four to five inches in size. The blooms feature an intense purple lip and the outer petals are lavender to even a light bluish hue. This plant provides an extra bonus with a sweet fragrance that can attract butterflies. We recommend growing this plant like a typical Cattleya with high humidity, a well drained potting media and bright indirect light. The Blue Jewel typically blooms in the spring time, but with the right conditions it will bloom again later in the year.  Rhycattleanthe 'Burana Beauty' Rhycattleanthe 'Burana Beauty' Rhycattleanthe Burana Beauty The Cattleya hybrid, Burana Beauty, looks like happiness tie-dyed onto a flower. The blooms feature distinctive red stripes on the ruffled center two petals and lip which is contrasted against bright, sunny yellow outer petals. Burana Beauty will put out sprays with four to five blossoms per bunch and will bloom two to three times per year. This orchid grows well indoors with bright light in addition to outdoors in tropical zones. The Burana Beauty prefers a fir bark potting mixture. As if you needed one more reason to add this plant to your collection, the Burana Beauty features a delightful citrus scent. 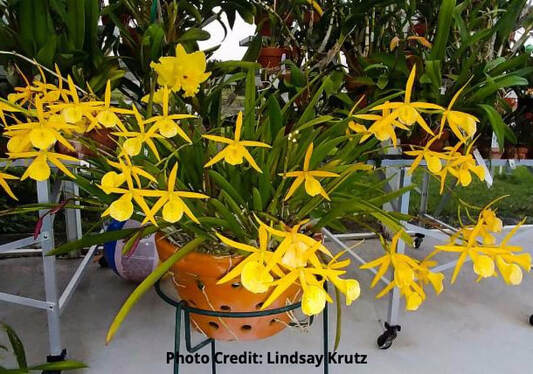 Brassocattleya Yellow Bird A hearty plant due to its Brassavola parent cross, this orchid is great for beginners. The long, skinny leaves resemble conifer needles and are a nice balance to the delicate yellow flowers that resemble a star with a big, pouty, freckled lip. Flowers will last a few weeks at a time and open as a light pink and darken to a bright yellow within days. They grow well in baskets, pots and mounted to wood. Under the right conditions, a Yellow Bird can bloom throughout the year, and it emits a sweet scent. Special thanks to L. Krutz for sharing this photo of her Yellow Bird. Keep an eye out for these beauties at your local garden center.
Happy (Year-Round) Blooming from Better-Gro!  If you keep your orchids outdoors during the summer to take advantage of the rainy season and warm weather, be careful that your plants aren’t receiving too much of a good thing. Orchids are natural epiphytes that derive water and nutrients from tree canopies. Their native settings allow plants to soak up just the right amount of rain, shed unnecessary water and allow roots to dry out between rain showers. Despite our attempts to mimic an orchid’s natural setting, an outdoor potted orchid needs extra care and attention to avoid receiving too much water.
Orchid Varieties
All orchids are not the same. Some varieties prefer to dry out completely between waterings such as vandas and phalenopsis (moth orchids). Other orchids such as paphiopedliums (lady slippers), miltonias (pansy orchids) and cymbidiums like to stay evenly moist but not soggy. Orchids that like something in the middle - evenly moist during high growth periods but dry outs between waterings - include cattleyas, dendrobiums and oncidiums. What Is the Harm in Too Much Water? There is such as thing as “too much of a good thing” as it relates to rainwater and your outdoor orchids. Without proper drainage, too much water can literally kill your plant. Overwatering can deprive your orchid roots of oxygen. In a short period of time, your healthy green or brown roots will turn black and begin to rot. This wet environment is ideal environment for bacteria or fungus. If you aren’t careful, the damage caused to your roots will eventually show in the leaves of your plants. By then, unfortunately, it may be too late to save the plant. So take the time this summer to routinely check your outdoor orchids to be sure they aren’t getting too much of a good thing with these summer rains. Orchids provide the perfect environment for pests to live and thrive. Warm, humid air; plump, soft leaves; tender buds and blossoms; and plenty of crevices to hide under leaves and in potting media. If you aren't careful, a small bug infestation can quickly grow into a big and costly problem. Below are some photos and descriptions to help you identify what may be harming your plants as well some suggestions on how to get rid of pesky pests.  Scale Scale are piercing, sucking insects that are difficult to control as the reproducing females are covered by a protective shell that also protects the pest's eggs. Scale is often resistant to many pesticides due to their hard outer shell.  Aphids Aphids are small, soft-bodied insects that are generally pear-shaped and green or black in color. They reproduce rapidly and are most often seen on flower buds/spikes and new growth. They produce a sticky substance referred to as honeydew which can encourage the growth of a black fungus (sooty mold). If the leaves of your plants exhibit sooty mold, it's likely that you have an aphid infestation.  Mealybugs Sometimes confused with scale, mealybugs are a soft-bodied insect that are readily identified at the mature stage as white to greyish-white and cotton-like. They are often found in the same areas as scale and can do substantial damage if not dealt with immediately. Removal of Scale, Aphids and Mealybugs: Use a small toothbrush or cotton swab soaked in rubbing alcohol (known as isopropyl alcohol) to remove the pests. Do not use other forms of alcohol as they may damage your plants. Be sure to get into the crevices of the leaves as bugs tend to hide there. This treatment is a tedious process and must be repeated often. However, if you catch and treat the infestation early, it will save your plants.  Thrips These are very small, elongated insects that are most prevalent on flowers and buds. Often times, their presence is not recognized until the damage from their feeding is obvious. These bugs suck the juice right out of your plants which can cause the deformation of buds, flowers, and new growth. You may also notice browning around the edges of your flowers. Removal To get rid of thrips, you will need to use a pesticide. Your plants should be inspected weekly, and the pesticide should be reapplied until the infestation has disappeared completely. 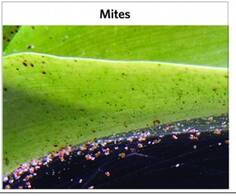 Mites Mites are microscopic arthropods that are related to ticks. They attack the undersides of leaves. Their presence is often unnoticed until it's too late. They leave behind silvery, pitted, unsightly leaves. Removal It is important to note that mites are not insects. Most insecticides are not effective at killing mites. You must purchase a pesticide that is specifically labeled as a miticide for use against this pest. For small infestations in the home, wiping the infested areas with a cotton ball dipped in rubbing alcohol can also be effective.  Grasshoppers
, especially Lubbers, can do significant damage to orchids in a very short period of time. Lubbers are usually 1” to 3” long and can vary in color from yellow to black depending on the species and stage of growth. Removal These are best controlled immediately by hand or pruners. The Oncidium genus includes roughly 330 species, but it’s often used in a less-technical term to refer to any number of 100,000-plus varieties and hybrids. The unifying trait of all of these orchids, regardless of how the term is used, is their swelling lower lip. 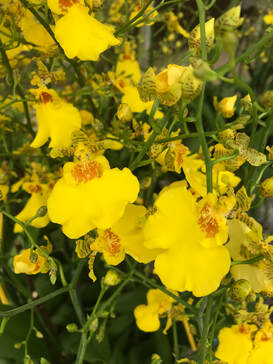 Onc. Sweet Sugar 'Lemon Drop' HCC/AOS Onc. Sweet Sugar 'Lemon Drop' HCC/AOS What Are Oncidium Orchids? In April 2013, researchers and orchid experts finally agreed to amend the Oncidium genus, which had come to be a “dumping ground” for orchids that didn’t fit in other genera. Most notably, equitant Oncidiums were reclassified into the Tolumnia genus. Other orchids that were reclassified included the mule-ear orchid, which was moved to the genus Trichocentrum, and the Brazilian oncidium, which is now part of the Gomesa genus. These changes show that even expert growers and researchers are still learning about the plants they love. While most official literature (such as American Orchid Society publications) has been updated to reflect these changes, Oncidium is still used by many to refer to plants that are technically part of other genera. After all, these orchids still all have a swollen lower lip. Thus, the term may be used to refer to about 330 species or to 100,000-plus hybrids. (Below, equitant Oncidiums will be compared to other types of orchids in the genera even though they’re now part of another genus.) Where Do Oncidiums Grow? Oncidium orchids are frequently found in Mexico and the Caribbean, although their natural habitat ranges from the southern portions of Florida through much of South America. They grow at all elevations in this large region, from sea level to the tree line of the Andes. Most Oncidiums are epiphytes and grow on trees. A few species are lithophytes (growing on rocks) or terrestrials (growing on the ground). 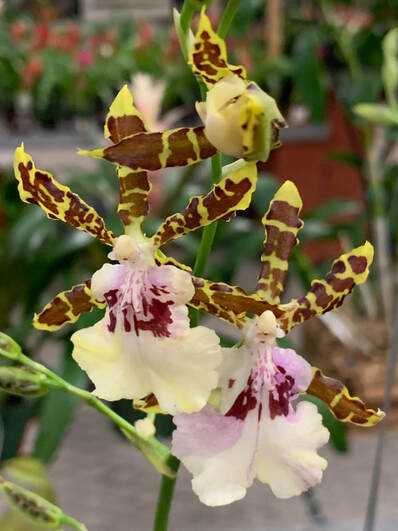 Onc. Wild Willie 'Pacific Bingo' Onc. Wild Willie 'Pacific Bingo' What Do Oncidium Orchids Look Like? Oncidiums are named for their flowers’ swollen lower lips. Oncidium comes from the Greek word “onkos,” which means “swelling.” The flowers are dominated by their lower lips, which are large, and often have ornate calluses or crests. Beyond this first common trait that defines all Oncidiums, these orchids can be further segregated into three categories based on appearance.
How Are Oncidiums Cared For?
Oncidiums don’t have many unique needs. Follow these general orchid care tips, and your Oncidium orchid should grow to be healthy and have great blooms. 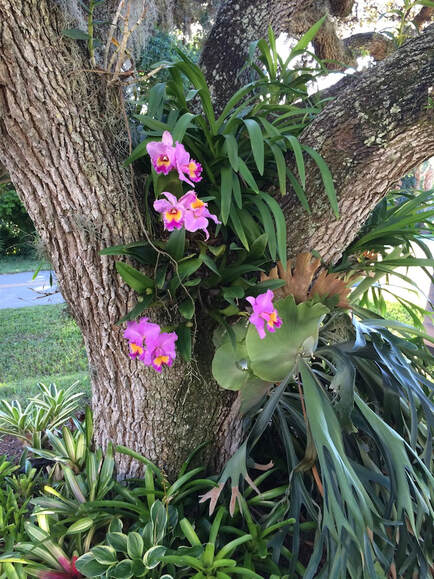 C. Spring Drumb 'Volcano Queen' C. Spring Drumb 'Volcano Queen' Cattleyas are an easy-to-grow orchid (which is one reason why they’re used in many orchid hybrids). If you’ve never grown a Cattleya before, however, there are some things to know about them. Namely, they love indirect light and don’t need frequent waterings. Here’s more information on growing these orchids. When discussing Cattleya care, it’s appropriate to begin with lighting and watering. The two most common mistakes people make with Cattleyas are giving the flowers too little light and too much water. After reviewing the proper lighting conditions and watering regime for Cattleyas, we’ll go into feeding, monitoring the temperature and repotting. Cattleyas Love Indirect Light Cattleyas love indirect light, and lots of it. In fact, they won’t flower if they don’t receive enough light. While Cattleyas need lots of light, they won’t fare well in direct sunlight. In the wild, they grow on the side of trees in Central and South America. They sit above much of the ground-level vegetation, so they get a decent amount of sunlight, but they’re below the forest’s canopy, so the light is filtered by trees’ leaves. Thus, they’re acclimated to and need indirect light. When selecting a location for your Cattleya, keep this lighting requirement in mind. Some good options are:
 C. lueddemanniana “Arthur Chadwick” C. lueddemanniana “Arthur Chadwick” Cattleyas Need Water About Once a Week The amount of water your Cattleya needs will depend on where it is in its growth cycle. When spikes are growing, it’ll need more water than when it’s resting or flowering. How often to water Cattleya depends on how it is potted and the type of potting mix used. For example, some potting medias (like a very coarse mix) and containers (like cedar baskets) allow the plant to dry out quickly, so you may have to water 2 or 3 times per week. However, if you use a potting media that holds moisture longer (like sphagnum moss), you may only water every 7 to 10 days. Keep in mind that even if you’re on a watering schedule, the humidity and weather can change everything. When watering, thoroughly soak the growing medium. Then, let it almost completely dry out before the next watering. After all, these flowers are used to growing on trees that don’t retain water. They aren’t accustomed to being in continually wet soil. If you’re in doubt as to whether your Cattleya needs water, wait one more day before watering it. While you should soak the growing medium, no part of the Cattleya should sit in still water. If the roots sit in water, they’ll rot. Similarly, if you water the plant too much when it’s flowering, water in the spike may rot young buds.  Blc. Yuko Ito 'Volcano Queen' Blc. Yuko Ito 'Volcano Queen' Cattleyas Do Best with an Orchid Specific Fertilizer If you don’t have an orchid-specific fertilizer, you can feed Cattleyas (as well as many other orchids) weakly weekly. That is, give them a standard 10-10-10 fertilizer at half strength or a 20-20-20- fertilizer at quarter strength once a week. When your orchid rests after the growing season, the feeding should be reduced to once every two weeks until the next growing season. For best results, however, Cattleyas should be fed with a fertilizer that’s specifically developed for orchids. We recommend alternating feedings between our Orchid Plus Plant Food and our Orchid Better-Bloom Plant Food, which are scientifically crafted to promote healthy growth and large, bright flowers. Feedings should be once a week when you’re orchid’s growing and flowering, and every other week when it’s resting. Cattleyas Like Hot Days and Cool Nights Cattleyas, especially large ones, enjoy big temperature swings. While smaller species don’t need quite as drastic changes in temperature, larger varieties of Cattleyas won’t flower without significant differences between day and night temperatures. Standard-sized Cattleyas prefer the temperature to be in the 80s or lower 90s during the day, and to have it dip down into the 50s at night. Miniature varieties, which tend to be under 12 inches, fare better with daytime temperatures between 65 and 75 degrees. When keeping Cattleyas indoors, it can be difficult to create significant temperature swings. If you aren’t able to manipulate temperatures so that your Cattleya at least sees temperature differentials during its flowering season, you may want to consider a smaller Cattleya. You’ll still need to find a way to cool it off during the night, but you can leave most smaller species at room temperature during the day. Cattleyas Should Be Repotted Every Few Years
Every few years, Cattleyas will need to be repotted. They should be put in a new container whenever:
Happy Blooming! 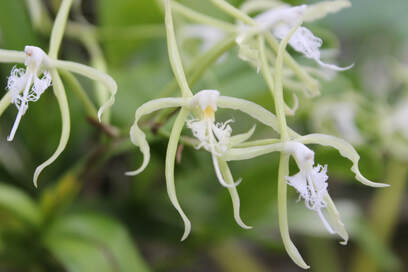 “When a man falls in love with orchids, he’ll do anything to possess the one he wants. It’s like chasing a green-eyed woman or taking cocaine…it’s a sort of madness.” - Susan Orlean, The Orchid Thief To the uninitiated, orchidelirium may sound like a fabricated term or a playful exaggeration—but it’s very real. For centuries, orchids have inspired fanatical fascination across all walks of life, including the scientific community.  Origin Story
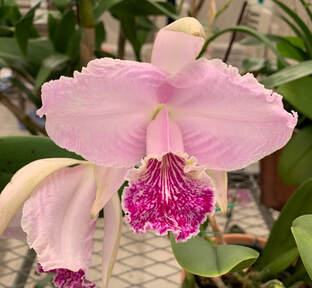
Legend has it that orchids arrived in London around 1818 when William John Swainson used them as packing material while shipping a collection of tropical plants from South America. One of these orchids bloomed on arrival, and the rest is history! While the facts of that story are debatable, there’s no doubt that the 19th century was the height of orchidelirium. The hysteria surrounding these beautiful plants pushed auction prices into the thousands, and specialized orchid hunters—more adventurers than botanists—were employed to track down the more exotic varieties of the already elusive bloom. Despite great risk, these hunters would venture into the perilous wilderness—and face-off with cutthroat competitors—to procure the rare and sought-after orchid for which wealthy Victorians were willing to pay a king’s ransom. Science Lends a Hand Without the helping hand of science, the orchid may have remained a rarity, attainable only by those of great wealth and influence. For example, you could wait as much as a decade for the plants to grow large enough for separation, and the process of division could cost thousands. Nowadays, advances in reproduction, propagation and cloning have made orchids easily attainable by all walks of life. According to Smithsonian orchid specialist Tom Mirenda, today’s consumers get “the cream of the crop” thanks to the cloning of plants selected specifically for their shape and color. And experimentation continues to push the envelope—rumor has it that one breeder is attempting to integrate the genes of a glow-in-the-dark squid! But it’s not all fun and games; the scientific community continues to make progress, even today. New breeding methods are being discovered, and DNA research is helping scientists understand how the various orchid species (over 25,000!) react to plant life in the wild. These discoveries will help ensure the survival of the orchid—and orchidelirium—for generations to come. Happy blooming!  Cattleya Secret Love 'Angel' Cattleya Secret Love 'Angel' Cattleya (KAT-ley-ah) orchids are perhaps the most iconic of all orchids. Even if you don’t know much about orchids, you’ve seen Cattleyas. They’re often used in wedding corsages, and they’re the national flower of Colombia, Costa Rica and Fiji (although they’re not native to the island). There’s likely no kind of orchid that’s more recognized than the Cattleya, but what are these orchids? What Are Cattleya Orchids? Cattleya is a genus of orchids named for William Cattley, who was the first European (he was a British botanist) to successfully propagate one. Since Cattley’s first success with the plant shortly after its discovery in 1817, the genus has grown to around 120 species and thousands of official varietals. (Varietals are registered with the American Orchid Society.) Today, it’s one of the most diverse of all orchid genera.  Cattleya Schillerina x SIB Cattleya Schillerina x SIB What Are Cattleyas’ Flowers Like? The flowers that made the Cattleya genus famous are large blossoms that can reach 8 inches. The largest flowers of any orchid, they’re well suited for corsages -- and they’re what caught the eye of Fiji’s government. In any genus with around 120 species and thousands of varietals, though, there will be great variety among the plants’ flowers. Large blossoms are just one of the many features you can find in Cattleyas. Within the genus, there are orchids that have:
 C. Spring Drumb 'Volcano Queen' C. Spring Drumb 'Volcano Queen' Where do Cattleyas Grow?
In nature, Cattleyas are found on trees from Costa Rica down through Argentina and Brazil. They’re epiphytes: they grow on another plant without harming it. In the dense rainforests of Central and South America, anchoring themselves to tree trunks and branches both helps them get sunlight and keeps their roots out of soggy soil. Like many orchids, Cattleyas love indirect light, and their roots will rot if the roots sit in water. In homes, Cattleyas need the same things they need in forests: plenty of indirect light and excellent drainage. Their need for good drainage has little impact on where they’re placed, as a well-draining medium can be placed in almost any potting container. Their need for lots of indirect light, however, does affect what areas in a home Cattleyas are suited for. They often excel in:
It’s appropriate that Cattleyas are the most iconic orchids, because they capture the world of orchids. They’re easy enough to care for that a novice gardener can grow them, and yet the genus is so varied that the most knowledgeable orchid grower can still discover new kinds of Cattleya orchids. If you would like to learn more about caring for Cattleyas, visit our care instructions here. Happy Blooming!  There is nothing quite like an orchid, and when they are mounted as they grow in nature, they are even more breathtaking. In nature, orchids grow on trees and their roots cling to the bark. There are a few tips and tricks to mounting an orchid, and with a little patience and love, you can create a beautiful, natural-looking orchid display. What You Will Need:
Step 1 Start with a natural material such as bark, cork, or driftwood for the mount. Place some damp moss on the mount where you plan to place the bare rooted orchid. Sphagnum moss will help keep your orchid from stressing during its time of attaching to the mount and will hold the extra moisture and nutrients needed for good growth. Better-Gro® Orchid Moss is an all-natural, fine quality sphagnum moss that is excellent for mounting.  Photo Credit: Paul Velasco Photo Credit: Paul Velasco Step 2: Place orchid on the mount and moss so that it’s able to attach and grow properly on the mount. Pay attention to the growing habits of the orchid. Some orchids grow straight up (monopodial) such as Phalaenopsis and Vandas. Others grow outward (sympodial) such as Cattleya and Dendrobiums. So, be sure to place your orchid on the mount so that it grows as it does in nature. Not mounting your orchid properly could prevent your orchid from growing and reduces your chance of flowering. Step 3: Attach orchid to the mount with the fishing line or florist wire. First place a small amount of moss around the roots to protect them from the wire. Wrap the wire around the mount, orchid, and moss -crisscrossing in different directions covering different area of the roots; essentially you’re tying everything together as one. Make sure the plant is tied snug; if it is loose and moves around, the roots will not attach to the mount. 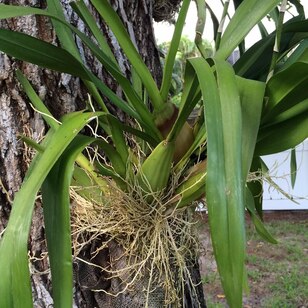 Step 4:
Ideas on where to place your mounted orchid are immense, but two popular places for mounted orchids are:
Take a step back and admire your beautiful, natural orchid display. Now show it off to all your friends! Just a little tender care will reward you with a gorgeous display of orchids in a natural setting that will delight you and fill your home with a wonderful touch of nature. Final Tips:
Plants, just like people, need food -- and they need good food. While orchids don’t eat the same foods as people, they still need to be fed diets that are high in the specific nutrients they need. To grow the strongest, most beautiful orchids, pay close attention to what and when you feed them.  Feed Orchids When You Water Them Orchids should be fed when you water them, which will likely work out to about once a week. To see if your orchids need food and water, just check their media. If it’s dry, then they’re thirsty -- and probably hungry, too. If the soil’s still damp and it hasn’t been a week since their last meal, then they might not be hungry quite yet. Let them go a little longer before you bring their next meal of plant food and water.  Feed Orchids Nitrogen, Phosphorus, and Potassium Orchids don’t have nearly as diverse a diet as people. They primarily need four things: water (of course), nitrogen, phosphorus, and potassium.
At Better-Gro, we’ve made feeding orchids the nutrients they need easy. Simply give them a meal of our Better-Gro® Orchid Plus® Plant Food once a week when you water your flowers. This is a specially formulated plant food that has the nitrogen orchids need to grow tall and big. Every fourth watering, substitute our Better-Gro® Better-Bloom® Plant Food when you feed them. We also recommend using it for 2-4 weeks after repotting your orchid. This food is higher in phosphorus, so it will ensure that your orchids have beautiful flowers once they’re fully mature and bloom. Feeding orchids is one of the most important aspects of taking care of them, but it’s hardly the only one. For more information on orchids or orchid care, visit EasyOrchidGrowing.com.
Many orchid enthusiasts feel that “Baggy Babies” are one of the most exciting and fun developments in today's orchid-growing world. Also known as “Packaged Orchids” or “Blooming-Size Orchids” in the retail world, a Baggy Baby delivers the thrill of watching an exotic plant through all stages of its development – your anticipation and enthusiasm growing until it finally bursts into vivid, brilliant blooms. Packaged Orchids can be purchased in various sizes. Better-Gro sells both 2” near-blooming-size and 4” blooming-size orchids. The smaller the pot, the longer you will have to wait for the plant to flower. A plant in a 2-inch pot will bloom in approximately 1½ to 2 years, while one in a 4-inch pot will reach the blooming stage in approximately a year if well-tended.  Reasons Baggy Babies Are Popular In addition to watching the orchid’s full growing cycle, another reason for the growing popularity is that you will find a wider variety of orchids in the Baggy Baby selection – a lot more varieties than can be purchased in the larger, blooming plants stocked by retailers. With the selection of a Baggy Baby, you can obtain a rare and difficult-to-find specimen you would not have a chance to get otherwise. Plus, they cost less --- enough that you can afford to indulge yourself in your hobby and purchase two or more Baggy Babies for the price of a single blooming orchid. 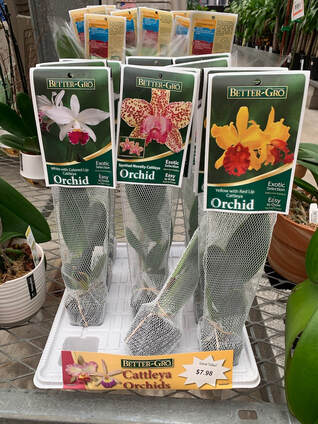 Caring for a Baggy Baby
You will need to repot your Baggy Baby immediately after purchase. This allows you to choose your own container in a style and color that match the décor of your home. Many orchid-growing enthusiasts like this as it means they also choose the potting medium they like and trust. Naturally, your growing plant will require high-quality nourishment just as the young of any species does. Better-Gro has a complete line of specialty media and plant food for the orchid enthusiast, and they are all endorsed by the American Orchid Society. It's no wonder Baggy Babies continue to gain popularity with orchid growers as they add so much to their hobby. The next time you visit your favorite orchid supplier, remember to ask about Baggy Babies and explore what's available. You are likely to find something really unique to add to your collection.  It’s natural for your orchid to enter a resting phase after blooming. With a little care and patience, your plant can produce even more blooms the next time. A few fairly simple steps can help your orchid grow new leaves and replenish its strength for its next show of gorgeous blooms.
Light Light is one of the most critical requirements for a healthy orchid. The leaves can tell you whether you’ve placed your plant in an optimum location. Dark green leaves will alert you that your plant needs more light. Light green leaves indicate the plant is receiving the right amount of sunlight. If placing your plants in windows, you can prevent sunburned plants by hanging a sheer curtain between your orchid and the glass. Water and Humidity Other critical considerations are proper watering and humidity, both of which ensure happy, healthy orchids. Overwatering is the most common problem associated with poor performing orchids. When watering an orchid, be sure to drain off excess water. Check that the pot’s drainage holes are operable, and place the pot on a bed of wet pebbles. The orchid should not be sitting in water but be placed just above it. Many people report orchids that flourish when placed in a window sill above the kitchen sink or in a bright bathroom. Repotting When the plant is resting is the best time to repot. Choose a potting medium that is appropriate to your variety of orchid. Wait until the blooms begin to fold and a new leaf begins to form, and then remove the bloom spike by cutting at the base of the spike. The new pot should be large enough to allow the plant to grow for two or three years before needing to be repotted again – approximately 2” larger than the current pot size. While roots growing outside the pot do not hurt the plant, it is better to have them tucked inside because they are vulnerable to being bumped and damaged when climbing out of their pots. Plant Food Feeding your resting orchid will help it rebloom faster. Orchids require plant food, known as fertilizer, for food. In nature, they receive this from dead or rotting plant and animal material. Regular feeding with an orchid plant food is essential to getting the best results from your orchids. There are several different nutrients that are required by the plant for proper growth. A plant food made specifically for orchids - such as Better-Gro® Orchid Plus® plant food - typically contains all the nutrients your orchids need. For best results, always follow the directions on the plant food package. We recommend feeding with Better-Gro® Better-Bloom® Plant Food every fourth feeding to help boost your orchid’s blooming performance. Continue to care for the plant, and it will flourish and reward you with bright happy blooms that last for months.  Den. Little Atro x atroviolaceum Den. Little Atro x atroviolaceum Latouriate Dendrobiums are a small group of 50 orchid species native to Southeast Asia and the Western Pacific Islands. Because they grow in extremely remote areas, these orchids were not commercially grown or widely collected up until recently. They have quickly gained in popularity because they’re so easy to grow for the home gardener, and these orchids flower frequently.
Most Latouriate Dendrobiums Grow in Papua New Guinea Latouriate Dendrobiums can be found from the Philippines to Samoa, but they mainly grow in Papua New Guinea. The island is home to 45 different latouriate Den species, accounting for 90% of the group’s varieties. The plants can be found on trees, and sometimes on the ground or rocks, throughout Papua New Guinea. Latouriate Dendrobiums Are Easy to Grow As with all orchids, latouriate Dendrobiums require specific growing conditions, however, they are one of the easiest orchid varieties to grow. Their needs include:
Latouriate Dendrobiums Flower Frequently Most of the latouriate Dendrobiums grown commercially are relatively small, but how frequently they flower makes them stand out from other orchid species. They never rest, because they’re from areas that see year-round rainfall. Therefore, it’s possible to see multiple flowerings per year. Blooms may last for as long as 7 to 8 weeks, or, in some cases, even 3 months. Most commonly available latouriate Dens feature relatively small flowers (1-3") in either white, purple or pale green. These flowers, which have three-lobed lips and a prominently raised callus, grow on top of spikes that emerge from the apex of club-shaped pseudobulbs. Each pseudobulb may produce one or two spikes among the leaves that grow at the top of the pseudobulb, and each spike will produce a few full flowers. Better-Gro grows and sells the latouriate Dendrobiums as full-sized plants as well as Baggy Babies. So the next time you're shopping, pick one up to add to your collection.  Onc. Sweet Sugar 'Lemon Drop' HCC/AOS Onc. Sweet Sugar 'Lemon Drop' HCC/AOS Did you know that it is scientifically proven that flowers can improve your mood, increase happiness and reduce stress? Just like exposure to pets, flowers can have the same positive impact on your feelings of happiness and overall well being.
Three separate studies conducted by Rutgers University Scientist, Dr. Jeannette Haviland-Jones, found that flowers are a positive emotion inducer. “Common sense tells us that flowers make us happy,” said Dr. Haviland-Jones. “Now, science shows that not only do flowers make us happier than we know, they have strong positive effects on our emotional well being.” A few takeaways from these important studies include:
So, as you continue to read the headlines, practice social distancing and are quarantined to your home, surround yourself with flowers and feel their positive power. Have you ever taken the time to compare the growing structure of an orchid? Obviously, blooms can vary widely across the thousands of orchid varieties that exist. But the basic growing structure of an orchid boils down to essentially two types: Monopodial and Sympodial. 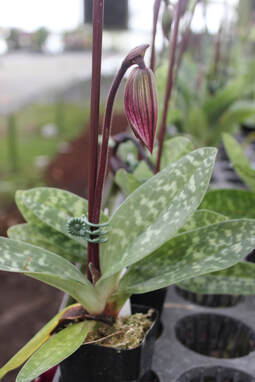 Paphiopedilum (also known as Lady Slipper orchids) are a Monopodial orchid. Paphiopedilum (also known as Lady Slipper orchids) are a Monopodial orchid. Monopodial Orchids Have One Root System Monopodial orchids have one stem, or, technically speaking, one root system. “Mono” is Greek for “one,” and “podia” translates from Greek as “foot” or “leg.” Since plants don’t have feet, podia is used to describe their roots. “Monostemic” technically means “one stem,” but monopodial is often used to describe monostemic orchids because monopodial orchids usually only have one stem, and orchids with one stem always have one root system. All of a monopodials’ leaves and flowers grow from its single stem, unless one of the nodes at the base of the stem sprouts a basal keiki. A basal keiki is a little stem, and can grow into a fully, beautiful stem, but it’s not a complete orchid in its own right. It lacks a root system, sharing the root system of the main stem. Thus, while monopodial orchids may develop basal keikis and eventually can have several stems, they always have only one root system. Significantly, monopodial orchids don’t have pseudobulbs. Any water reserves they have are in their roots and leaves. Many phalaenopsis, paphiopedilum and vanda orchids are monopodial. 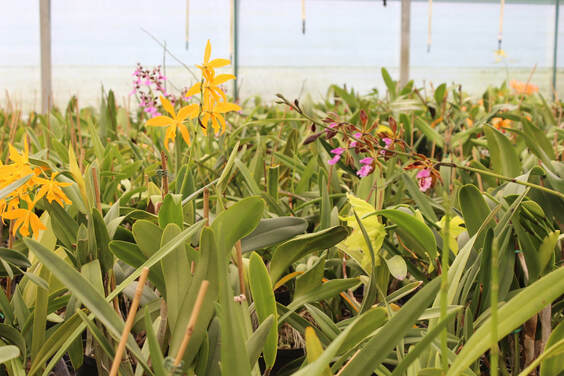 Sympodial Orchids in the Greenhouse at Better-Gro Sympodial Orchids in the Greenhouse at Better-Gro Sympodial Orchids Have Multiple Root Systems Sympodial orchids are characterized by their multiple root systems. “Sym” can be translated from Greek into English as “with,” “joint,” “together” and “sharing.” A sympodial orchid has a stem that grows pretty close to the ground, although their flower spikes are sometimes mistaken for stems. From this low-growing stem, which is called a rhizome, sprout pseudobulbs, one growing from the base of the previous one. Each pseudobulb grows its own flower spike and root system, hence the name sympodial. Pseudobulbs look like flower bulbs, but they aren’t bulbs. Their main purpose is to store water, providing a reserve supply should the growing medium around the flower dry out. Cattleya, cymbidium, dendrobium and oncidium orchids are sympodial. Caring for Monopodial and Sympodial Orchids
Monopodial and sympodial orchids have many similar needs, but there are two minor points where the care they need differs. First, repotting sympodial orchids can be slightly more involved than repotting monopodial ones. Repotting monopodial orchids is pretty straight-forward. The plant should go in the center of the pot so it can grow out towards the edge of the potting medium in all directions. Because the pseudobulbs of sympodial orchids can grow in any matter of patterns, it can sometimes take a little more creativity to center a sympodial orchid in a pot. Additionally, some pseudobulbs, particularly new ones with young root systems, may need to be anchored with clips or other methods. Second, monopodial orchids usually need more regular waterings than sympodial ones. Because monopodial orchids lack the pseudobulbs that sympodial orchids have, monopodials will dry out faster if they aren’t well watered. In general, monopodial orchids should be watered as their potting medium becomes dry. Sympodial orchids can often go a little while after their medium dries out before they need water. Both monopodial and sympodial orchids are fun to grow and become beautiful plants. For more information on different types of orchids and orchid care, visit www.EasyOrchidGrowing. Happy Blooming!  Phal. KV Charmer "KV5702" Phal. KV Charmer "KV5702" As orchid growers, we are often asked the question, “My orchid seems to be growing well and it looks healthy, but I have not been able to get it to bloom again. Why is this?” The answer is often a simple modification to the amount of light and/or a change in temperature to kick start a blooming cycle. Not all orchids have the same cultural requirements, so it is important to first identify the type of orchid you have – this is essential!  Mtssa. Kauai's Choice 'Tropical Fragrance' AM/AOS Mtssa. Kauai's Choice 'Tropical Fragrance' AM/AOS Refer to these web pages for care guidance for your specific type of orchid: Cattleya, Dendrobium, Oncidium, Paphiopedilum, Phalaenopsis, and Vanda. Here you will find light, temperature, humidity and feeding guidance. In addition to making slight modifications to your orchids environment, it's important to note that all orchid growers need patience. Most orchids bloom seasonally or just annually. This is because there are certain temperature and/or light changes that occur during the year that trigger flowering. Plants need specific amounts of light each day to be able to convert food (fertilizer) and water into energy. This energy is then used to power the processes required for the plant to grow and bloom.  Cattleya Secret Love Angel Cattleya Secret Love Angel Light If your plant is receiving adequate water and food (the plant looks lush and healthy, leaves are a nice dark green) but does not flower or only produces a few flowers, then chances are it is not getting enough light. You should try to gradually increase the amount of light your plant is receiving (leaves should be a medium-green). For simplicity sake, light requirements can be divided into four levels:
Don't Forget Night Some Cattleyas initiate spikes in response to the longer, uninterrupted nights of winter. Therefore, all else being equal, they will only flower when they receive the adequate amount of night hours (although this can vary significantly between Cattleya species). Temperature Temperature plays an important role in flowering. Most standard Phalaenopsis for example, require cooler nights and days (60-75 °F) to initiate spikes. These cooler temps not only initiate the Phalaenopsis spike, but can also influence the number of flowers produced on that spike. This is why in our area of the south Phalaenopsis plants bloom primarily from winter to spring. This may differ if you are located in the north. On the other hand, many Dendrobiums like it hot, so they will typically flower from mid-summer to fall. We hope these tips bring about the ultimate reward of a re-blooming orchid. For more information visit EasyOrchidGrowing.com and be sure to watch our Orchid Care videos. Happy Blooming! 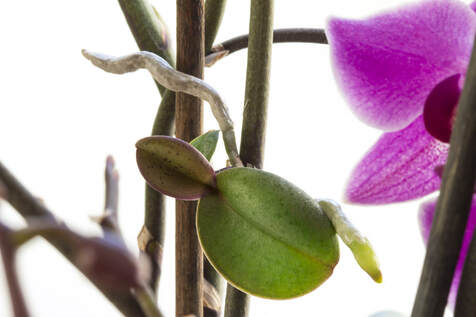 Orchids sometimes sprout baby plants, or keikis, from their flower stems. Literally translated, “keiki” is Hawaiian for “the little one” -- and that’s just what keikis are. They’re little orchid plants.
Why are Keikis Produced? Mature orchids may produce keikis for a variety of reasons. For instance, some genera, such as phalaenopsis and dendrobium orchids, are prone to create keikis. Many times, however, keikis are created when an orchid is stressed. If an orchid is dying, asexually producing a keiki may be its best chance at passing on its genes. Because keikis are produced asexually, without pollination, each keiki is genetically identical to its mother plant. Once mature, they’ll have the same flowers as the mother plant. How Do You Identify Keikis? Keikis look like little plants growing on the stem of a parent plant. On phalaenopsis orchids, they usually occur on the nodes along the stem. On dendrobiums, they’re typically at the end of the cane, which is where the hormones necessary to produce a keiki accumulate. What Do You Do with Keikis? If you recognize a keiki growing on one of your orchids, the first thing you should do is check the health of the mother plant. Because keikis are often induced by stress, a new keiki may be a sign that your orchid isn’t doing well. You ought to check all of the plants conditions, but there are two specific things to pay attention to:
To remove a keiki, simply cut it off with a sharp, sterile blade. To prevent more keikis from forming, you may want to cut back the mother orchid’s spikes after they’re done blooming. Sprinkle cinnamon, which is a natural fungicide, on any open wounds after cutting. If you’d like to keep the keiki and nurture it into a mature orchid, follow these steps:
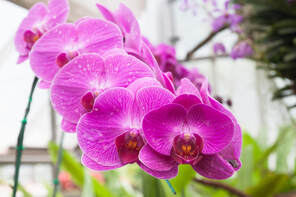
 Orchids are ancient flowers that have been enjoyed by many civilizations throughout history. Their significance has varied from culture to culture. Despite regional differences, their meaning and symbolism have always reflected their natural elegance and exoticism.  LC. Purple Cascade 'Fragrance Beauty' LC. Purple Cascade 'Fragrance Beauty' Ancient Greece and China: A Symbol of Vitality and Fertility In both Ancient Greece and China, the orchid was seen as a symbol of vitality and fertility. The Chinese would give it as a gift that suggested many children, which was viewed as a blessing in ancient times. The Chinese also saw the orchid as a sign of innocence and refinement, although these were less prevalent than fertility. The Greeks had a slightly more elaborate belief in connecting an orchid to fertility. They believed that if an unborn child’s father ate large (young) orchid tubers, then the child would be a boy. Alternatively, if the mother of the unborn child ate little tubers, the child was expected to be a girl.  Neofinetia falcata, Photo Credit: AOS Neofinetia falcata, Photo Credit: AOS Medieval Japan: A Trophy of Warriors In Pre-Industrial Japan, Samurai would search for a specific type of orchid: Neofinetia falcata. Native to Japan, this vanda is rare -- especially in the wild. Prized for its foliage and fragrance, this orchid was more sought-after than most by Japan’s royalty. To please the nobles whom they served, Samurais would go on grand journeys in search of a Neofinetia falcata. If a Samurai found one and successfully brought it back, it’d be presented as a trophy of the warrior’s quest, a sign of his bravery. Victorian England: A Sign of Luxury and Wealth Orchids didn’t reach England until the Victorian era, and even then they were rare. They weren’t native to England, and transporting them across oceans was tenuous. Their delicacy made them uncommon, which only heightened interest in them. They quickly became the flower of choice among gentry, not just because they were beautiful but also because they showed off one’s wealth. To own an Orchid in Victorian England was to indulge in luxury, something commoners could little afford to do.  Onc. Sweet Sugar 'Lemon Drop' HCC/AOS Onc. Sweet Sugar 'Lemon Drop' HCC/AOS Today: A Palette of Colors and Meanings Today, orchids are available in more colors than ever before, and color is the primary determiner of an orchid’s meaning:
The orchid has a deep, rich history of meanings and symbols, but its message has never been as versatile as it is today. With so many colors to choose from, not to mention various varieties of orchids, you can find one that perfectly expresses your sentiments, whatever they may be.
For more about orchids and orchid care, visit EasyOrchidGrowing.com. Happy Blooming! 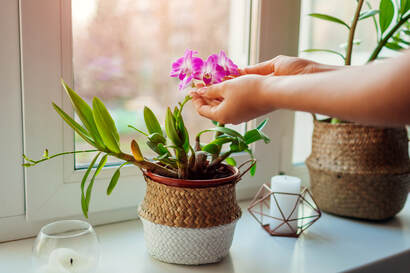 Orchid needs change with the seasons just like any other plant. While many orchids are dormant during the winter, they still need light, water, regular feedings and just the right temperatures. So, we've assembled some grow tips to help you care for your orchids during the colder, dryer winter months.
Temperature Many commonly grown orchids are from temperate, tropical regions, so it's important to keep a close eye on the temperatures. Most orchids prefer daytime temps between 70° and 90° F and nighttime temps between 55° and 75° F (similar to most people). For those of you that grow your orchids outdoors, you will need to relocate your plants indoors or to an insulated garage when the forecast calls for temperature drops below 55° F. Amateur greenhouse growers may want to consider investing in a space heater that is specifically designed for greenhouse use. Watering We recommend that you water your orchids less frequently during the winter season. Water your plants early in the morning after the sun has risen to allow excess moisture to evaporate during the day. Watering at night can increase the chances of fungal or bacterial infections which are more common during the winter. Additionally, you will want to allow your plants to dry out between waterings. The exception to this recommendation is when caring for Phalaenopsis and Paphiopedilum (Lady Slipper) orchids. These should be kept consistently moist even during the winter months. Light Ensuring the right amount of light can be more difficult during the winter months with shorter days and less daylight. Orchids often need 12 to 14 hours of indirect light, depending on the variety. You may need to relocate your orchid throughout the day to follow the sunlight. Usually, a north- or east-facing window is best, but be sure the window has some type of covering like a sheer curtain to avoid direct sunlight on your plants. For those of you that live in snowy locations, don't forget that sunlight can reflect off the snowy ground to cause even more sunlight through your windows. In addition to checking for cold drafts, check the amount of direct sunlight coming in through your windows throughout the day to avoid "sun-burning" your plants. Plants need plenty of light during the winter, you just want to make sure they don't burn. If you live in a part of the country where the sun doesn’t rise until 8:00 a.m. and sets as early as 4:00 p.m. during the winter months, an indoor grow light can help you ensure that your orchids are receiving the proper amount of light. Plant Food Although your orchid may not be growing as quickly as it does during the spring and summer months, it is very important to keep feeding your plants during their dormancy. We recommend diluting your plant food, but don't omit feeding entirely. For more on information on how to care for orchids, visit easyorchidgrowing.com. Happy Blooming! 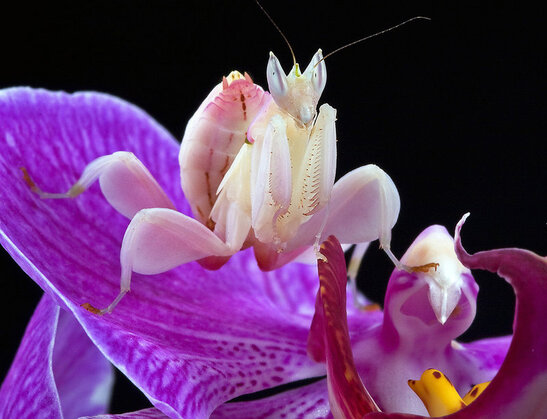 Photo Credit: NPR Photo Credit: NPR There are many different orchids that display a wide array of appearances within the Orchidaceae family. Some of the more exotic-looking orchids resemble animals. The monkey face orchid, flying duck orchid, hedgehog face orchid and bee orchid all bear a remarkable resemblance to the animals they’re named after. Mimicry isn’t a one-way street, though. While some orchids grow to look like animals, one insect matures to resemble orchids. Unless you look closely, you could even mistake the orchid mantis for a flower. Looking Like an Orchid
The orchid mantis is a species of praying mantis that models itself after a flower, specifically a pink orchid. Its scientific name is Hymenopus coronatus. The mantis is white with pink accents, which vary from soft to bright, and its legs have lobes that make them look like the petals of an orchid. Its size is even about that or an orchid flower, with females growing to be about 2.5 inches, and adult males measuring about 1 inch. Most impressive, the mantis can vary its color with certain environmental conditions, namely changes in light or temperature, so that it resembles not just an orchid in general but the specific orchids that it’s living near. Living Like an Orchid The orchid mantis doesn’t just look like an orchid, but, in many ways, it also lives like one. The insect is native to Malaysia, where plenty of orchid species (including pink ones) come from. In Malaysia, the mantis is found in bushes and on trees -- the same places where epiphytic orchids grow. (Epiphytes are plants that grow harmlessly on other plants.) The mantis even likes the same weather as orchids, preferring daytime temperatures between 77 and 95° F, and needing nighttime temperatures to be at least 64° F. It also requires high humidity levels, ideally a relative humidity between 60 and 70 percent. Staying Safe While Hunting Insects By resembling an orchid and living in the same places where an orchid would, the orchid mantis is able to hide from predators and hunt its prey. Birds will overlook the sizeable insect, mistaking it for a flower. Smaller insects will too, coming too close to the predator. The mantis will eat small butterflies, hoverflies, houseflies, crickets and other, similar insects, which are all attracted to the pink orchid the mantis resembles. Learning about orchids is a never-ending pursuit, and the field of study isn’t limited to the flowers themselves. To learn more about orchids, their relationships with insects and orchid care, visit EasyOrchidGrowing.com. Happy Blooming! In our most recent blog post, we shared a few orchid home remedies that really work. Here a few more suggestions that you can easily find around the house that are safe for the environment and helpful for your plants.  Dishwashing Liquid A mild dishwashing detergent can serve as an effective treatment for aphids and other pests. Simply mix 1 tablespoon of liquid dishwashing detergent with a half gallon of water. Pour into a clean spray bottle. Generously spray the leaves and exposed orchid roots, taking extra care to spray the underside of each leaf where pests hide. Wait a few hours and spray again with fresh water to remove the soap and the pests.  Cinnamon This common spice has several beneficial properties for your orchids. There are times when you need to cut away fungus or bacteria from the leaves of your plants. Sprinkle ground cinnamon directly on the leaves where you made a clean cut to help heal the wound. You can also steep cinnamon sticks in hot water over night to make a mild fungicide. Use the “cinnamon tea” in a spray bottle to treat mild fungus issues. This simple treatment can also reduce fungi growth among your orchids such as mushrooms.  Bananas Don’t toss your banana peels; put them to work. Banana peels contain many important nutrients including potassium. You can make a natural fertilizer spray for your orchids by soaking leftover peels in water for a couple of days. Discard the peel and use the “banana water” in a spray bottle to feed your orchids. If you have orchids mounted to trees, you can hang the peel around your orchids for gradual fertilization over time. Your orchids will absorb nutrients from the banana as it deteriorates.  Mouthwash
 fights bacteria in your mouth, and it can do the same with your orchids. Spritz your orchid weekly with a dose of mouthwash to deter pests and bacteria. Avoid flavored mouthwashes because they contain additives.  Most gardeners with a green thumb have a few proven home remedies that truly work. There are countless tricks-of-the-trade, but here are a few things around the house that we know can help with your orchid collection. Epsom Salts Epsom Salts aren’t just for soaking in the tub. Epsom Salts contain magnesium which is an essential element in orchid nutrition. One teaspoon of Epsom Salts added to one gallon of water is all you need to incorporate into your watering routine. This extra boost can help remove the reddish-purple color from cattleya leaves and kick start flower bud formation in most orchid varities. Rubbing Alcohol Many times you don’t need complex chemicals to rid your orchids of pesky pests. Simply soak a cotton ball with 70% isopropyl alcohol and wipe away scale, mealybugs, aphids and mites. The alcohol destroys an insect’s outer waxy covering, which will kill these bugs essentially on contact. Beer If you struggle with slugs, trying buying them a beer. Place shallow containers filled with beer around your plants. Slugs will be drawn to the yeast in the beer and drown in the container.  Hanging Upside Down
Hanging a Vanda upside down will get it to produce roots when you have a long bare stem. Cutting Your Orchid Cut through the rhizome of a cattleya about 3 to 4 bulbs from the front lead while still in the pot to force dormant eyes to break on the older bulbs. Blooms come from the new growths, so this should increase number of flowers and give multiple divisions with new shoots; should one decide to divide. Dividing your orchids is an important step in expanding your collection as well as ensuring healthy growth for the future. There are a number of reasons why you may need to divide an orchid such as: (1) out growing an existing pot and (2) the deterioration of potting medium over time. How Often Should You Divide? Most orchid medium starts to deteriorate within two to three years. Refreshing the potting medium is important for the plant to absorb fresh nutrients and avoid root rot, fungus or bacteria. Depending on the orchid variety, most plants will be ready for splitting or a larger pot within two to three years of active growth. There are two recommended times to divide your orchids:
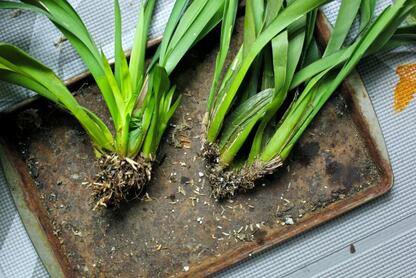 Steps to Take When Dividing
Your Orchids:
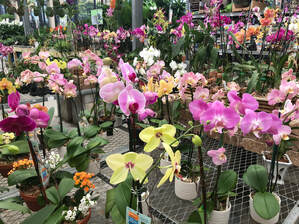 As orchids have increased in popularity, so too has their availability at traditional nurseries, home improvement stores and grocery stores. So with more choices available, how do you know that you are selecting a healthy plant? Whether you are just looking for an arrangement that will last longer than traditional cut flowers, or you plan to nurture the plant for years of enjoyment, it’s important to take a few extra minutes to pick the right plant. 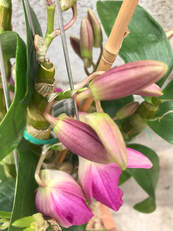 What to Look For When Selecting Your Orchid Buds and Flowers
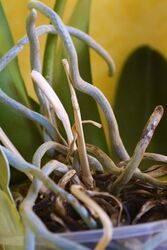 Roots
Foliage
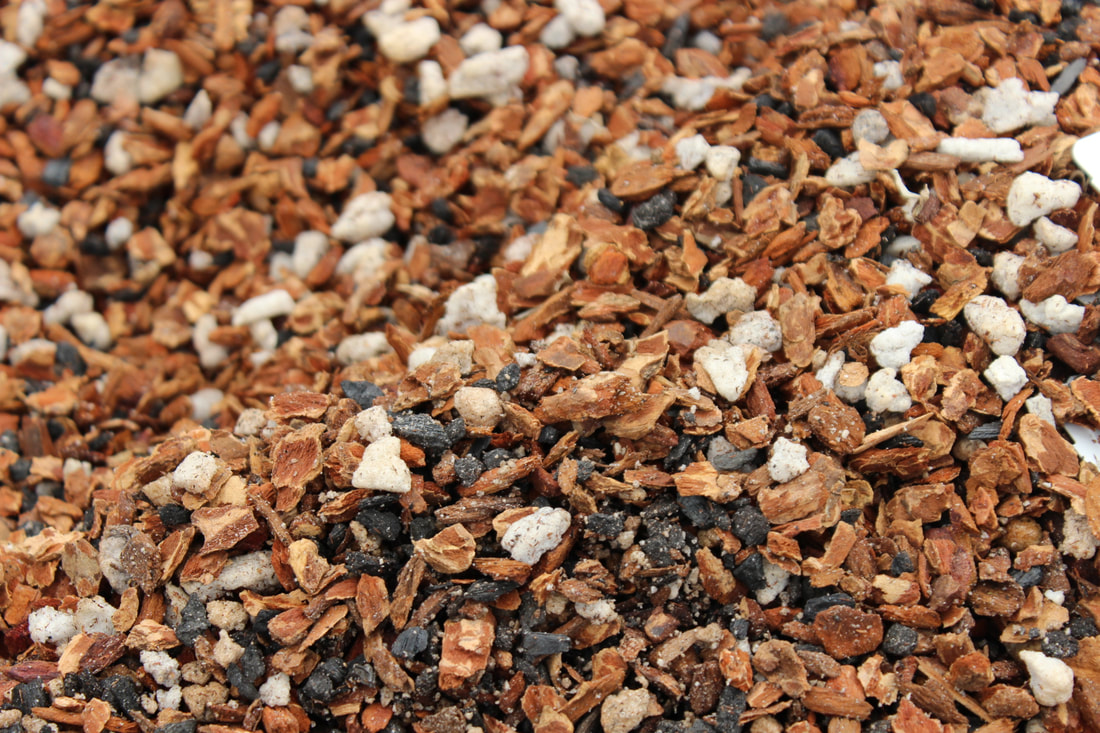
Pots and Potting mix
|

Resources
|
Company |
|